Installing 16 Inch Patio Blocks: A Comprehensive Guide
Creating a patio using 16-inch patio blocks represents a viable option for homeowners seeking an aesthetically pleasing and functional outdoor space. The 16-inch size offers a balance between manageability during installation and achieving a visually appealing scale. This article provides a step-by-step guide to installing 16-inch patio blocks, covering essential preparation, installation techniques, and post-installation considerations.
Key Point 1: Site Preparation and Excavation
Prior to commencing any patio installation, thoroughly preparing the site is crucial for longevity and stability. This involves several key steps, beginning with determining the perimeter of the patio. Stakes and string are commonly used to outline the desired area, ensuring accurate dimensions and straight lines. Once the perimeter is established, accurately measuring the area is imperative to calculate the required number of patio blocks and base materials.
Excavation is the next critical phase. The depth of excavation depends on various factors, including the type of soil, the expected load on the patio, and local climate conditions. Generally, excavating to a depth of 6 to 8 inches is recommended. This depth accommodates the necessary layers of base material and the patio blocks themselves. It is vital to ensure proper drainage during excavation. A slight slope, typically around 1/8 inch per foot, should be incorporated to allow water to run away from the house and prevent water from pooling on the patio surface.
During excavation, removing all organic matter, such as grass, roots, and topsoil, is essential. Organic materials decompose over time, potentially causing the patio to settle unevenly. After excavation, the soil needs to be compacted using a plate compactor. This process stabilizes the soil base, preventing future settling and providing a solid foundation for the subsequent layers.
Key Point 2: Base Material Installation and Compaction
The base material is a critical component of a successful patio installation. It provides a stable and level surface for the patio blocks to rest upon. Crushed gravel, typically consisting of angular stones ranging in size from 3/4 inch to 1 inch, is a common and effective choice for the base material. The crushed gravel provides excellent drainage and interlocks tightly when compacted, creating a solid foundation.
Spreading the base material in even layers is crucial. It is recommended to apply the gravel in lifts of no more than 2 to 3 inches at a time. This allows for efficient and thorough compaction. Each layer must be meticulously compacted using a plate compactor. Compacting the base material in multiple layers ensures optimal density and stability, minimizing the risk of settling over time.
Maintaining a consistent depth of the base material across the entire patio area is also important. This can be achieved by using measuring tools and levelers to ensure a uniform thickness. Achieving a perfectly level base is not necessarily required, as the final leveling will be accomplished with a layer of sand. However, the base should be as close to level as possible to minimize the amount of sand needed and ensure consistent block placement.
After compacting the base material, a layer of landscape fabric can be applied. This fabric acts as a barrier, preventing weeds from growing up through the patio blocks and helping to stabilize the base material by preventing it from mixing with the soil below. The landscape fabric should be overlapped by several inches at the seams to provide complete coverage.
Key Point 3: Sand Bedding and Block Placement
The final layer before installing the patio blocks is a bedding layer of sand. This sand layer serves as a leveling medium, allowing for minor adjustments in height and ensuring that the patio blocks are perfectly level. Concrete sand, also known as coarse sand, is typically recommended for this purpose. Avoid using play sand or fine sand, as these types of sand can compact too tightly and hinder drainage.
Spreading the sand evenly is crucial for achieving a level patio surface. The sand can be screeded using two pipes or boards as guides, pulling a straightedge across the guides to create a smooth and level surface. The depth of the sand layer should typically be between 1 and 2 inches. Avoid over-compacting the sand layer, as this can make it difficult to adjust the blocks during installation.
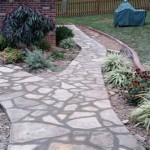
The patio block installation should start from a corner or straight edge, working outwards. Gently place each 16-inch patio block onto the sand bed, ensuring it is level with the surrounding blocks. A rubber mallet can be used to gently tap the blocks into place and make minor adjustments. Use a level frequently to check for levelness in all directions. If a block is not level, carefully lift it, add or remove sand as needed, and replace the block.
Maintaining consistent spacing between the patio blocks is essential for both aesthetics and stability. Spacers, available at most hardware stores, can be used to ensure uniform joint widths. Common joint widths range from 1/4 inch to 1/2 inch. As the blocks are installed, regularly check for alignment and adjust as necessary to maintain straight lines and consistent spacing.
For edges that require cutting, a concrete saw or a masonry chisel and hammer can be used. Accurately measure and mark the blocks before cutting to ensure a precise fit. Safety glasses and hearing protection should be worn when cutting concrete blocks. After cutting, the edges should be smoothed to remove any sharp or rough edges.
After all the patio blocks have been installed, the joints between the blocks should be filled with polymeric sand. Polymeric sand is a specialized type of sand that contains polymers that bind together when activated with water. This helps to stabilize the blocks, prevent weed growth, and inhibit insect infestation. Follow the manufacturer's instructions carefully when applying polymeric sand. Typically, the sand is swept into the joints, compacted slightly, and then lightly wetted to activate the polymers.
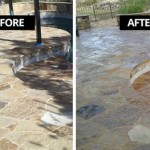
After the polymeric sand has cured, the patio is ready for use. Regular maintenance, such as sweeping and occasional cleaning, will help to keep the patio looking its best for years to come. Pressure washing can be used to remove stubborn stains, but it is important to use a low-pressure setting to avoid damaging the patio blocks or the polymeric sand.
Proper installation and maintenance are key to ensuring the long-term performance and aesthetics of a 16-inch patio block patio. By following the steps outlined in this guide, homeowners can create a durable and attractive outdoor space that will provide years of enjoyment.

Pavestone Paver Installation

How To Install Pavers Installing A Patio Step By Guide

How To Install Pavers Installing A Patio Step By Guide

How To Build A Paver Patio Young House Love

Laying Patio Pavers Polycor Inc

Installing Patio Pavers Is Not As Tough You Think The Post

Paver Patios Install A Diy Patio With Brick Or Stone Decks Com

Laying Patio Pavers Polycor Inc

How To Install A Paver Patio Garden Gate

Paver Installation Landscaping Network