Replacing Patio Sliding Door Wheels: A Comprehensive Guide
A patio sliding door provides seamless access to outdoor spaces, enhancing both aesthetics and functionality. However, over time, the wheels that allow the door to glide smoothly can wear out, leading to difficulty in operation, annoying noises, and potential damage to the door frame. Replacing these wheels is a common maintenance task that can significantly improve the performance and longevity of the sliding door.
This article will provide a detailed guide on how to replace patio sliding door wheels, covering the necessary tools, preparation steps, removal of old wheels, installation of new wheels, and final adjustments. By following these instructions, homeowners can effectively and safely rectify this common issue, restoring the smooth operation of their patio sliding door.
Identifying the Need for Wheel Replacement
The first step in addressing a malfunctioning sliding door is accurately diagnosing the problem. Several indicators suggest that the wheels may require replacement. One of the most obvious signs is difficulty in sliding the door. If the door requires excessive force to open or close, the wheels are likely worn or damaged. Another telltale sign is a grinding or scraping noise when the door is in motion. This noise often indicates that the wheels are no longer rolling smoothly and are rubbing against the track.
Visual inspection can also reveal the condition of the wheels. Look for signs of wear and tear, such as cracks, chips, or flat spots on the wheel surface. Check if the wheels are properly aligned and moving freely. If the door is sagging or uneven, this could also be attributed to damaged or worn wheels. The presence of excessive debris or dirt accumulation within the wheel housing can also impede their function. Before assuming the wheels are the sole issue, eliminate other possible causes of sliding door problems, such as misaligned tracks or obstructions in the track.
Addressing these issues promptly can prevent further damage to the door frame or track. Allowing the door to continue operating with damaged wheels can exacerbate the problem, leading to more costly repairs in the future. Consequently, regular inspection of the wheels and timely replacement are crucial for maintaining the optimal performance of the patio sliding door.
Gathering the Necessary Tools and Materials
Before commencing the replacement process, it is essential to gather all the necessary tools and materials. Having everything readily available will ensure a smooth and efficient repair. The required tools typically include a screwdriver set (both flathead and Phillips head), a putty knife or scraper, a measuring tape, a socket wrench set (if the wheels are secured with nuts), a work light, and safety glasses. A pair of gloves is also recommended to protect the hands.
The most crucial material is, of course, the replacement wheels. It is imperative to obtain the correct type and size of wheels for the specific patio sliding door model. The best approach is to remove one of the old wheels and take it to a hardware store or home improvement center to find a matching replacement. If the original wheel is unavailable, take precise measurements of the wheel diameter, width, and the distance between the mounting points. Consult with a knowledgeable sales associate to ensure compatibility.
Additional materials that may be needed include penetrating oil or lubricant to loosen any stuck screws or components, cleaning supplies to remove dirt and debris from the track and wheel housing, and shims to adjust the door height after the new wheels are installed. Having these tools and materials prepared in advance will contribute to a successful and stress-free wheel replacement process.
Step-by-Step Guide to Replacing the Wheels
Once the tools and materials are assembled, the actual wheel replacement can begin. The following steps provide a detailed guide for this process:
Step 1: Prepare the Door and Surrounding Area
Start by ensuring the work area is well-lit and free from obstructions. Place a drop cloth or protective covering beneath the door to catch any debris. Carefully remove any decorative trim or moldings that may be obstructing access to the wheel housing. Gently slide the door open or closed to a position that provides comfortable access to the wheels.
Step 2: Locate and Access the Wheel Housing
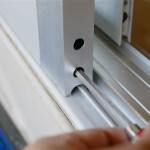
The wheel housing is typically located at the bottom of the sliding door panel. Examine the bottom edge of the door for access panels or screws that secure the housing. Some doors may have a snap-on cover that can be gently pried off with a putty knife. Others may require the removal of screws using a screwdriver. If the screws are rusted or stuck, apply penetrating oil and allow it to soak for a few minutes before attempting to remove them.
Step 3: Remove the Old Wheels
Once the wheel housing is accessible, carefully remove the old wheels. Depending on the design, the wheels may be held in place by screws, nuts, or spring clips. Use the appropriate tool to loosen and remove the fasteners. If the wheels are difficult to remove, gently pry them out with a putty knife or scraper, taking care not to damage the door frame or wheel housing.
Step 4: Clean the Wheel Housing and Track
Before installing the new wheels, thoroughly clean the wheel housing and the surrounding track. Use a brush or vacuum cleaner to remove any dirt, debris, or old lubricant. Wipe down the surfaces with a damp cloth and allow them to dry completely. This will ensure that the new wheels operate smoothly and without obstruction.
Step 5: Install the New Wheels
Position the new wheels into the wheel housing, ensuring they are properly aligned and oriented. Secure the wheels in place using the original fasteners, such as screws, nuts, or spring clips. Tighten the fasteners firmly, but avoid over-tightening, which could damage the wheel or housing. Verify that the wheels rotate freely and without any binding.
Step 6: Reassemble the Wheel Housing
Once the new wheels are securely installed, reassemble the wheel housing. Replace any access panels or covers, and secure them with screws or snap-on clips. Ensure that all components are properly aligned and fastened. If any decorative trim or moldings were removed earlier, reinstall them at this time.
Step 7: Adjust the Door Height (If Necessary)
After replacing the wheels, it may be necessary to adjust the door height to ensure it slides smoothly and seals properly. Most patio sliding doors have adjustable rollers that can be used to raise or lower the door. Locate the adjustment screws on the wheel housing and use a screwdriver to turn them clockwise to raise the door or counterclockwise to lower it. Make small adjustments and test the door's operation after each adjustment until it slides smoothly and seals tightly against the frame. Shims can also be used to fine-tune the door height if necessary.
Step 8: Test and Lubricate the Door
Thoroughly test the operation of the sliding door by opening and closing it several times. Ensure that it slides smoothly and without any difficulty. Listen for any unusual noises or binding. If necessary, apply a silicone-based lubricant to the track and wheels to further improve the door's performance. Wipe away any excess lubricant with a clean cloth.
Troubleshooting Common Issues
While the wheel replacement process is generally straightforward, some common issues may arise. One potential problem is difficulty in removing the old wheels. If the screws or fasteners are rusted or corroded, applying penetrating oil and allowing it to soak for a few minutes can help to loosen them. In severe cases, a screw extractor may be necessary to remove damaged or stripped screws.
Another issue is finding the correct replacement wheels. As mentioned earlier, it is best to take an old wheel to a hardware store for comparison. If this is not possible, take accurate measurements of the wheel diameter, width, and mounting point distance. Online retailers specializing in patio door parts can also be a valuable resource. When ordering online, carefully review the product specifications and customer reviews to ensure compatibility.
Sometimes, after replacing the wheels, the door may still not slide smoothly. This could be due to misalignment of the track or damage to the track surface. Inspect the track for any bends, dents, or obstructions. Use a level to ensure that the track is properly aligned. If the track is damaged, it may need to be repaired or replaced. Lubricating the track with a silicone-based lubricant can also help to improve the door's sliding action.
If the door is still difficult to operate after addressing these issues, it may be necessary to consult with a professional door repair technician. They have the expertise and tools to diagnose and resolve more complex problems with patio sliding doors.

How To Replace A Patio Sliding Glass Door Roller 1080p

Identifying The Right Replacement Roller For Your Sliding Glass Door Swisco Com

Sliding Door Repair Track Glass Roller Weatherstrip

How To Replace Sliding Glass Door Rollers Doctor

Replacing Patio Door Rollers Like A Pro Quick And Easy Tutorial

Sliding Door Stuck How To Replace The Rollers

Barton Kramer Wallace Sliding Glass Door Replacement Roller 10063

Barton Kramer Sliding Glass Door Replacement Roller 458

How To Replace Sliding Glass Door Rollers Diy Guide

All Brands Sizes Styles Patio Door Roller Screen Wheel Master Window Parts
Related Posts


