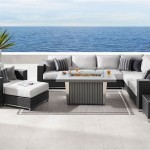
Replacing a Broken Glass Patio Table Top: A Comprehensive Guide
A glass patio table top adds elegance and functionality to outdoor spaces. However, glass is inherently fragile and susceptible to damage from various causes, including accidental impacts, severe weather, and even gradual stress over time. When a glass patio table top breaks, it presents both an aesthetic problem and a safety hazard. Fortunately, replacing a broken glass patio table top is a manageable task that can restore both the beauty and usability of the furniture. This article provides a comprehensive guide to replacing a broken glass patio table top, covering the necessary steps, materials, and considerations to ensure a successful outcome.
The initial assessment of the damage is crucial for determining the appropriate course of action. If the glass is shattered into numerous pieces, safety precautions are paramount. Wearing thick gloves, safety glasses, and closed-toe shoes is essential to prevent cuts and injuries. Carefully collect the broken glass pieces, placing them in a sturdy container such as a cardboard box lined with heavy-duty plastic. Label the container clearly as "Broken Glass" to avoid accidental mishandling. If the glass is cracked but still largely intact, secure it with heavy-duty tape to prevent further fragmentation. This preliminary step is vital for ensuring a safe working environment and preventing further damage.
Once the area is cleared of broken glass, the next step involves measuring the dimensions of the original table top. Accurate measurements are critical for ordering a replacement that fits the table frame perfectly. Measure the length, width, and thickness of the glass. For round tables, measure the diameter. If the original glass top had specific features, such as rounded corners or beveled edges, these details must be noted. The thickness of the glass is especially important as it contributes to the table's stability and weight-bearing capacity. Using a digital caliper can provide precise measurements for thickness and edge details. In cases where the original glass is completely shattered and impossible to measure accurately, the dimensions of the table frame itself can be used as a guide, but it's crucial to account for any overhang or specific design features.
Key Point 1: Accurate Measurement and Glass Selection
The selection of the replacement glass is a critical aspect of the replacement process. Several factors should be considered, including the type of glass, its thickness, and any additional treatments that may enhance its durability and safety. Tempered glass, also known as safety glass, is the preferred choice for patio table tops due to its superior strength and safety characteristics. Tempered glass is significantly stronger than standard annealed glass and, if broken, it shatters into small, relatively harmless pieces instead of sharp, jagged shards. This characteristic significantly reduces the risk of injury.
The thickness of the glass is another crucial consideration. A thicker glass top will provide greater stability and weight-bearing capacity. For most patio tables, a glass thickness of 1/4 inch (6mm) to 3/8 inch (10mm) is generally adequate. However, for larger tables or those expected to bear heavier loads, a thicker glass may be necessary. Consulting with a glass professional can provide valuable guidance on selecting the appropriate thickness based on the table's size, design, and intended use.
In addition to tempered glass, other options are available, such as laminated glass or acrylic. Laminated glass consists of two or more layers of glass bonded together with a plastic interlayer. This type of glass is extremely strong and, if broken, the glass fragments remain adhered to the interlayer, preventing them from scattering. Acrylic is a lightweight, shatter-resistant alternative to glass. While acrylic is less likely to break than glass, it is also more prone to scratching and may not have the same aesthetic appeal as glass.
When ordering the replacement glass, provide the glass supplier with all the necessary measurements and specifications, including the type of glass, thickness, dimensions, and any special features such as rounded corners or beveled edges. Obtaining a detailed quote from the supplier before placing the order is advisable, including the cost of the glass, any additional treatments, and delivery charges. Verify the supplier's return policy in case the glass arrives damaged or does not meet the specified requirements.
Once the replacement glass is obtained, carefully inspect it for any defects or damage before proceeding with the installation. Ensure that the dimensions match the original measurements and that the glass is free from scratches, chips, or other imperfections. If any issues are identified, contact the glass supplier immediately to arrange for a replacement or refund.
Preparing the table frame is an essential step in the replacement process. Thoroughly clean the frame to remove any dirt, debris, or remnants of the broken glass. Inspect the frame for any damage, such as dents, bends, or rust. Repair any damage to ensure that the frame is structurally sound and provides a stable base for the new glass top. If the frame is made of metal, consider applying a rust-inhibiting paint to prevent further corrosion. For wooden frames, apply a sealant or varnish to protect the wood from moisture and weathering.
The table frame often includes rubber bumpers or suction cups that secure the glass top and prevent it from sliding or vibrating. Inspect these bumpers or suction cups and replace them if they are worn, cracked, or missing. New bumpers or suction cups will provide better grip and stability, ensuring that the glass top remains securely in place. Applying a small amount of silicone sealant to the bumpers or suction cups can further enhance their adhesion.
Key Point 2: Preparing the Table Frame and Ensuring Stability
Installing the replacement glass top requires careful handling and attention to detail. Before lifting the glass, ensure that the work area is clean and free from obstructions. Ideally, two people should be involved in the installation process to provide assistance and prevent accidental drops or injuries. Wearing gloves is recommended to protect the glass from fingerprints and provide a better grip.
Carefully lift the glass top and position it over the table frame. Align the edges of the glass with the frame, ensuring that it is centered and evenly supported. Gently lower the glass onto the frame, taking care not to scratch or damage the glass or the frame. If the glass top is equipped with rubber bumpers or suction cups, ensure that they are properly aligned and in contact with the frame.
Once the glass top is in place, inspect it to ensure that it is level and stable. If the table is not level, shims can be placed under the legs to adjust the height and eliminate any wobbling. Check that the glass top is securely attached to the frame and does not move or slide when gently pushed or shaken. If the glass top is loose, additional bumpers or suction cups may be needed to provide a more secure fit.
After the installation is complete, thoroughly clean the glass top with a glass cleaner and a soft cloth. Remove any fingerprints, smudges, or residue to restore the glass to its original clarity. Inspect the table again to ensure that all components are properly installed and that the table is safe and stable for use. Allow any sealant or adhesive to fully cure before placing any items on the table.
Proper maintenance is essential for prolonging the life and appearance of the replacement glass patio table top. Regularly clean the glass with a mild detergent and water to remove dirt, dust, and other debris. Avoid using abrasive cleaners or scouring pads, as these can scratch or damage the glass. A glass cleaner specifically designed for outdoor use can provide additional protection against the elements.
During periods of inclement weather, such as heavy rain, snow, or strong winds, consider covering the patio table with a protective cover. This will shield the glass from the elements and prevent damage from falling debris. Avoid placing heavy objects on the glass top, as this can cause stress and potentially lead to cracks or breakage. When moving the table, lift it carefully from the base rather than dragging it across the ground, as this can damage the frame and the glass top.
Key Point 3: Installation, Maintenance, and Longevity
Replacing a broken glass patio table top is a feasible task that can significantly enhance the aesthetic appeal and functionality of outdoor spaces. By following the steps outlined in this guide, homeowners can safely and effectively replace a broken glass top, ensuring a durable, safe, and visually appealing piece of furniture. Attention to detail, accurate measurements, and the use of appropriate materials are crucial for a successful outcome. Regular maintenance and care will prolong the life of the replacement glass top and preserve its beauty for years to come.
When considering the cost of replacement, it's advisable to obtain quotes from multiple glass suppliers to ensure a competitive price. The cost will vary depending on the type of glass, its thickness, the size of the table, and any additional features such as rounded corners or beveled edges. Some suppliers may offer installation services for an additional fee. Weigh the convenience of professional installation against the cost savings of performing the task independently.
Before discarding the broken glass, check with local recycling centers to determine if they accept glass recycling. Recycling glass helps conserve natural resources and reduces landfill waste. If recycling is not available, dispose of the broken glass properly by wrapping it securely in newspaper or cardboard and placing it in a sturdy container labeled as "Broken Glass." Contact the local waste management authority for specific disposal guidelines in the area.
Replacing a broken glass patio table top is not just about restoring a piece of furniture; it's also about ensuring the safety and enjoyment of outdoor spaces. By taking the time to properly assess the damage, select the appropriate replacement glass, and carefully install it, homeowners can create a beautiful and functional outdoor area that can be enjoyed for years to come.

Diy Patio Table Top Fixing A Broken On Budget

Diy Replace Broken Patio Glass Top Table

How To Repair Glass Patio Table Problems

Diy Patio Table Top Fixing A Broken On Budget

Upcycle Broken Glass Patio Table With Wood

Pin On Tips

Replacement Top For Patio Table After Glass Shattered Diy Furniture Makeover

Converting Our Broken Glass Patio Table Into A Beautiful Wooden

Patio Table Glass Broken Diy Replacement Better Than Before

Paper Daisy Designs Makeover An Outdoor Table And Refresh Chairs Diy Patio Tops
Related Posts

