Essential Aspects of Patio Cover Kits DIY
Creating a beautiful and functional outdoor living space doesn't have to be a daunting task. By choosing a patio cover kit DIY project, you can enjoy the benefits of a shaded and comfortable outdoor area without the high cost of professional installation. Here are some essential aspects to consider for a successful patio cover kit DIY project:
1. Choose the Right Kit
The first step is to select a patio cover kit that meets your specific needs and preferences. Consider factors such as the size of your patio, the desired level of shade, and the architectural style of your home. Choose a kit that includes clear instructions, high-quality materials, and all the necessary hardware for easy installation.
2. Gather the Necessary Tools
Before you begin the installation process, make sure you have gathered all the essential tools, including a drill, a saw, a level, a measuring tape, a wrench, and a ladder. It's also recommended to wear safety glasses and gloves during the installation.
3. Prepare the Installation Site
Begin by clearing the installation area and ensuring the ground is level. If necessary, create a foundation of gravel or pavers to provide a stable base for the patio cover. Mark the locations of the support posts and dig holes for the post bases.
4. Install the Support Posts
Insert the support posts into the holes and fill around them with concrete. Make sure the posts are plumb and level using a level. Allow the concrete to set completely before proceeding.
5. Assemble the Roof Frame
Next, assemble the roof frame according to the manufacturer's instructions. Use a level to ensure the frame is square and level. Secure the frame to the support posts using bolts or screws.
6. Cover the Roof
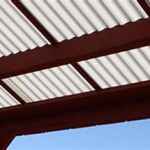
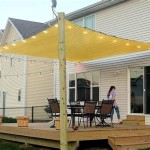
Choose a roofing material such as corrugated metal, polycarbonate panels, or fabric. Cut the material to size and attach it to the roof frame using screws or nails. Ensure the roofing material is properly sealed to prevent water leakage.
7. Install the Finishing Touches
Complete the installation by adding any finishing touches, such as gutters, downspouts, or light fixtures. Ensure all components are securely fastened and the patio cover is stable and weather-resistant.
Conclusion
By following these essential aspects, you can successfully install a patio cover kit DIY and enjoy a beautiful and comfortable outdoor living space for years to come. Remember to carefully plan and prepare, select quality materials, and follow the manufacturer's instructions for a safe and rewarding DIY project.

Diy Alumawood Patio Cover Kits Shipped Nationwide

Diy Aluminum Patio Cover Kits Build My Own Carport

Design And Buy Alumawood Do It Yourself Aluminum Patio Cover Kits

Diy Alumawood Patio Cover Kits Shipped Nationwide Insulated Freestanding Photo Gallery

Diy Aluminum Patio Cover Kits Build My Own Carport

25 Diy Patio Cover Ideas 2024 Easiest Options

Diy Alumawood Patio Cover Kits Shipped Nationwide

Diy Alumawood Patio Cover Kits Covers Simi Valley

Diy Patio Covers Cover Patios Ideas

Adjustable Patio Cover Kits Alumashade


