How to Pour a Cement Patio: A Comprehensive Guide
Pouring a cement patio is a significant home improvement project that can add value and usable outdoor space to a property. While it requires careful planning, proper preparation, and diligent execution, the result is a durable and aesthetically pleasing surface for relaxation, entertainment, and various outdoor activities. This article provides a comprehensive guide to the process, outlining the necessary steps from initial planning to the final finishing touches.
Before embarking on this project, it is crucial to thoroughly review local building codes and regulations. Permits may be required depending on the size and location of the patio. Failure to comply with regulations can result in fines or the need to remove and redo the work. Check with the local municipality's building department to ensure complete adherence to all applicable requirements.
The longevity and appearance of the cement patio depend heavily on the quality of materials used and adherence to best practices during the pouring process. Shortcuts or substandard materials will likely lead to premature cracking, crumbling, and an unsatisfactory outcome. Investing in quality materials and dedicating sufficient time and effort to each stage of the process are vital for a successful project.
Planning and Preparation: Setting the Foundation for Success
The planning and preparation phase is arguably the most critical aspect of pouring a cement patio. Rushing this stage can lead to costly mistakes and a compromised final product. Accurate measurements, careful excavation, and proper sub-base construction are essential for a durable and level patio.
The first step is to define the dimensions and shape of the patio. Use stakes and string to mark the perimeter of the area. Consider the intended use of the patio and its relationship to existing structures, landscaping, and drainage. Account for any obstructions, such as trees or underground utilities. A properly shaped and sized patio will seamlessly integrate into the existing outdoor environment.
Next, calculate the volume of cement required for the patio. This is determined by multiplying the length, width, and desired thickness of the patio. A standard patio thickness is 4 inches, but thicker slabs may be necessary for areas subject to heavy traffic or loading. It is advisable to add a small percentage (around 5-10%) to the calculated volume to account for waste and unevenness in the sub-base.
Excavation to the appropriate depth is the next crucial step. The excavation depth should be the desired patio thickness plus the thickness of the sub-base material. A typical sub-base consists of 4-6 inches of compacted gravel. The excavated area should extend slightly beyond the marked perimeter of the patio to accommodate the forms.
Compacting the sub-grade, the native soil beneath the patio, is vital for preventing settling and cracking. Use a plate compactor or hand tamper to thoroughly compact the soil. Add gravel in layers of 2-3 inches, compacting each layer before adding the next. This creates a stable and well-drained sub-base that will support the cement slab.
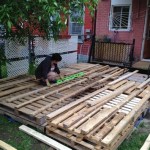
Forms, typically made of lumber or flexible plastic, are used to contain the wet cement and define the shape of the patio. The forms should be securely staked in place and level with each other. Proper form construction is essential for achieving a level and aesthetically pleasing patio surface. Ensure the forms are sturdy enough to withstand the pressure of the wet cement.
Mixing and Pouring the Cement: The Heart of the Project
Mixing and pouring the cement is a physically demanding process that requires careful attention to detail. A proper mix consistency, efficient pouring techniques, and appropriate consolidation methods are all crucial for achieving a strong and durable concrete slab.
Cement can be mixed by hand, using a portable cement mixer, or purchased pre-mixed from a concrete supplier. For larger patios, ordering pre-mixed cement is often the most efficient and practical option. When mixing cement, strictly adhere to the manufacturer's instructions regarding the water-to-cement ratio. Too much water will weaken the cement, while too little water will make it difficult to work with. A properly mixed cement should have a plastic-like consistency and be easily workable.
When pouring the cement, work in manageable sections. Start at one end of the forms and gradually pour the cement, ensuring that it fills all areas. Use a shovel or rake to distribute the cement evenly and eliminate any air pockets. Avoid pouring large amounts of cement in one area, as this can create uneven settling and cracking.
Consolidating the cement is essential for removing air pockets and ensuring a dense and strong slab. Use a concrete vibrator to consolidate the cement, especially around the edges of the forms and in areas where reinforcement is present. Avoid over-vibrating, as this can cause segregation of the cement components. If a concrete vibrator is not available, a shovel or rod can be used to manually consolidate the cement.
Screeding is the process of leveling the wet cement to the desired height and creating a smooth surface. Use a screed board, which is a long, straight piece of lumber, to level the cement. Rest the screed board on the forms and use a sawing motion to remove excess cement and fill in low spots. Check the levelness of the surface frequently using a level. Multiple passes with the screed board may be necessary to achieve a perfectly level surface.
Finishing and Curing: Ensuring Longevity and Appearance
Finishing and curing are the final but equally important steps in pouring a cement patio. Proper finishing techniques enhance the appearance of the patio, while proper curing ensures the cement achieves its maximum strength and durability.
After screeding, allow the cement to set for a short period, typically a few hours, until the surface water disappears. This is known as the "bleed water." Once the bleed water is gone, the surface can be floated. Floating uses a hand float (made of wood or magnesium) or a bull float (a large float attached to a long handle) to further smooth the surface and embed any aggregate just below the surface.
Edging is the process of rounding the edges of the patio to prevent chipping and create a more aesthetically pleasing appearance. Use an edging tool to carefully round the edges of the patio along the forms. Run the edging tool along the forms multiple times to create a smooth and consistent edge.
Jointing, also known as control jointing, involves creating shallow grooves in the concrete slab to control where cracking occurs. Cracking is inevitable in cement due to expansion and contraction. Control joints create weakened planes in the slab, encouraging cracks to form along these lines rather than randomly across the surface. Use a groover tool to create joints at regular intervals, typically every 8-10 feet. The depth of the joints should be at least one-quarter of the slab thickness.
Texturing is the final step in finishing the concrete surface. Various texturing techniques can be used to create different appearances and improve slip resistance. A broom finish is a common and simple texturing method that involves dragging a broom across the surface of the wet concrete. Other texturing options include stamping, troweling, and using exposed aggregate.
Curing is the process of keeping the concrete moist for a period of several days to allow it to hydrate properly and achieve its maximum strength. The cement needs moisture to complete the chemical process of hydration. Curing can be achieved by various methods, including spraying the concrete with water regularly, covering it with wet burlap, or applying a curing compound. The curing process should last for at least 7 days, and longer in hot or dry weather.
After the curing period is complete, the forms can be removed. Gently pry the forms away from the concrete, being careful not to damage the edges of the patio. Backfilling around the patio with soil or gravel can help to stabilize the edges and prevent erosion. Landscaping around the patio can further enhance its appearance and integrate it into the surrounding environment.
By following these steps carefully and paying attention to detail, a durable and aesthetically pleasing cement patio can be achieved. The result will be a valuable addition to the property, providing years of enjoyment and enhancing the overall outdoor living space.

Pouring Concrete Patio What Could Go Wrong With Doing It Yourself

Diy Concrete Patio In 8 Easy Steps How To Pour A Cement Slab

How To Pour A Concrete Patio With S Wikihow

How To Plan Pour Your Diy Concrete Patio Liberty Ready Mix

Pouring Concrete General Info Tips Local Contractors

Diy Concrete Patio How To Pour A Slab Bob Vila

Quikrete Building A Concrete Patio

Backyard Stained And Stamped Concrete Patios

How We Install Concrete Patios A Visual Ilration

How To Prepare A Site For Concrete Base Forms And Rebar