How To Install Patio Stones On Grass
Installing patio stones directly onto grass can provide an aesthetically pleasing and functional outdoor space without the extensive excavation and preparation typically required for more permanent patio installations. While this method is less durable than installations with a compacted gravel base and leveling sand, it offers a cost-effective and relatively quick solution for creating walkways, small seating areas, or decorative features in a garden or lawn. Careful preparation and selection of materials are key to ensuring the longevity and stability of the patio.
This method is best suited for areas with light foot traffic and well-drained soil. Heavily trafficked areas or areas prone to waterlogging are likely to experience settling, shifting, and eventual deterioration of the patio surface. The type of soil also plays a significant role; sandy soils generally provide better drainage than clay soils, which tend to retain moisture and are more susceptible to frost heave in colder climates. Before commencing the installation, evaluate the existing soil conditions and consider potential solutions for improving drainage if necessary.
1. Planning and Preparation
The initial stage of installing patio stones on grass involves careful planning and preparation. This includes determining the size and shape of the patio, selecting suitable patio stones, and preparing the ground surface. A detailed plan will help avoid costly mistakes and ensure a successful installation.
Begin by measuring the area where the patio stones will be installed. Mark the perimeter of the patio using stakes and string. This will clearly define the boundaries of the workspace and serve as a visual guide during the installation process. Consider the intended use of the patio when determining its size. A small seating area might only require a few square meters, while a larger area intended for dining and entertaining will necessitate more space.
Next, select the appropriate type of patio stones. Consider factors such as size, shape, color, and material. Patio stones are available in a wide range of materials, including concrete, natural stone, and brick. Concrete pavers are generally the most affordable option and are available in various colors and styles. Natural stone pavers, such as flagstone or slate, offer a more rustic and organic aesthetic but are typically more expensive. Brick pavers provide a classic and timeless look and are durable and long-lasting. Choose a patio stone that complements the existing landscape and architectural style of the property.
Once the area is marked and the patio stones are selected, prepare the ground surface. This involves removing the grass and topsoil within the marked perimeter. Use a spade or sod cutter to carefully remove the grass and a thin layer of topsoil. Aim to remove approximately 2-3 inches of material. This will create a level surface for the patio stones and prevent them from sitting too high above the surrounding lawn.
After removing the grass and topsoil, compact the exposed soil using a hand tamper or plate compactor. Compaction helps to stabilize the soil and prevent settling. Ensure the soil is evenly compacted across the entire area. This step is crucial for creating a stable base for the patio stones. For areas with poor drainage, consider adding a layer of gravel to the excavated area before compacting the soil. This will help improve drainage and prevent water from pooling under the patio stones.
2. Installing the Patio Stones
With the ground prepared, the next stage involves installing the patio stones. This requires careful placement and leveling of each stone to create a smooth and even surface. Attention to detail during this stage is crucial for ensuring the stability and aesthetic appeal of the patio.
Begin by placing the patio stones within the prepared area. Arrange them in the desired pattern, leaving a small gap between each stone. These gaps will be filled with sand or gravel to provide stability and prevent the stones from shifting. Experiment with different patterns and arrangements to find the one that best suits the space and the chosen patio stones.
Level each patio stone individually using a rubber mallet and a level. Place the level on the surface of the stone and gently tap it with the rubber mallet until it is perfectly level. Check the level in multiple directions to ensure that the stone is level both horizontally and vertically. If the stone is too low, add a small amount of soil or sand underneath it to raise it to the correct level. If the stone is too high, remove some of the soil or sand underneath it. This process may require several iterations to achieve a perfectly level surface.
Once all the patio stones are placed and leveled, fill the gaps between the stones with sand or gravel. Use a broom to sweep the sand or gravel into the gaps, ensuring that they are completely filled. This will help to lock the stones in place and prevent them from shifting over time. After filling the gaps, use a hose to lightly water the sand or gravel. This will help to compact the material and further stabilize the patio stones. Avoid overwatering, as this can erode the soil underneath the stones.
Regularly check the level of the patio stones and make any necessary adjustments. Over time, the stones may settle or shift due to soil movement or weather conditions. Use a rubber mallet and level to gently tap the stones back into place. Periodically refill the gaps between the stones with sand or gravel to maintain stability. Proper maintenance will help to extend the lifespan of the patio and prevent costly repairs.
3. Maintenance and Long-Term Care
Even with careful installation, a patio installed directly on grass requires regular maintenance to ensure its longevity and aesthetic appeal. Proper maintenance practices will help prevent settling, shifting, and weed growth, preserving the integrity of the patio surface.
Regularly sweep the patio stones to remove debris, such as leaves, dirt, and grass clippings. This will help to prevent the buildup of organic matter, which can attract pests and promote weed growth. Use a stiff-bristled broom to effectively remove debris from the surface of the stones and the gaps between them.
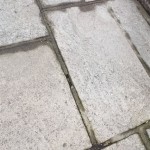
Control weed growth around the patio stones. Weeds can grow through the gaps between the stones, disrupting the surface and detracting from the aesthetic appeal of the patio. Remove weeds by hand or use a weed killer specifically designed for use on patios. Be careful to avoid damaging the surrounding lawn or garden plants. Applying a pre-emergent herbicide can help prevent weed seeds from germinating in the gaps between the stones.
Protect the patio stones from staining. Certain liquids, such as oil, grease, and wine, can stain the surface of the stones. Clean up spills immediately to prevent staining. Use a mild detergent and water to scrub the affected area. For stubborn stains, consider using a specialized patio stone cleaner. Sealing the patio stones can help to protect them from staining and make them easier to clean.
Address any settling or shifting of the patio stones promptly. Over time, the stones may settle or shift due to soil movement or weather conditions. Use a rubber mallet and level to gently tap the stones back into place. If significant settling occurs, it may be necessary to remove the stones, re-compact the soil underneath, and re-level the stones. Adding more gravel base underneath the stones may be necessary to improve stability. Regularly inspecting the patio and addressing any issues promptly will help to prevent further damage and maintain its overall integrity.
Consider the effects of frost heave in colder climates. In regions with freezing temperatures, the soil can expand and contract as it freezes and thaws, causing the patio stones to shift and heave. To mitigate the effects of frost heave, ensure that the soil is well-drained and that there is adequate space for water to drain away from the patio stones. In areas prone to severe frost heave, it may be necessary to install a deeper base layer of gravel to provide additional insulation and drainage.
By following these guidelines for planning, installation, and maintenance, homeowners can create a functional and aesthetically pleasing patio surface directly on grass. The relatively low cost and ease of installation make this a viable option for those seeking a quick and simple outdoor space solution.

Diy Patio With Grass Between Pavers And A Fire Pit

How To Install Pavers Installing A Patio Step By Guide

How To Lay Paving Stones On Grass Hunker

How To Lay A Stepping Stone Walkway True Value

Diy Paver Artificial Turf Patio

How To Install Artificial Grass Between Pavers Paving Ideas Festival Turf

Dry Laying Slabs On Gravel Or Sand Instruction Kronos Ceramiche Floor Coverings In Porcelain Stoneware

How To Lay Artificial Grass Between Pavers Turf Factory

How To Make A Stepping Stone Walkway Lowe S

How To Set Flagstone In Grass Hunker
Related Posts