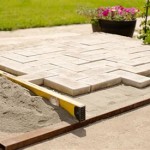
How to Install Patio Pavers Against a House
Installing patio pavers against a house requires careful planning and execution to ensure long-lasting beauty and functionality. This type of installation differs from a standard patio because it necessitates specific considerations regarding drainage, structural integrity, and the protection of the home's foundation. A well-executed paver installation against a house can enhance curb appeal, provide a comfortable outdoor living space, and even increase property value. However, a poorly executed installation can lead to water damage, structural issues, and costly repairs.
The following guide provides a comprehensive overview of the steps involved in installing patio pavers against a house. It is crucial to adhere to local building codes and regulations throughout the entire process. Consulting with a qualified contractor or landscape architect is recommended, especially for complex designs or if you are unfamiliar with construction techniques.
Key Point 1: Proper Planning and Preparation
The initial phase of any paver installation is critical. This involves detailed planning, accurate measurements, and meticulous site preparation. Laying a strong foundation for the pavers is paramount for a successful and durable patio.
1. Determine the Patio Dimensions and Design: Begin by accurately measuring the area where the patio will be installed. Consider the desired size, shape, and overall layout. Sketch a detailed design plan that includes the location of the pavers in relation to the house, doors, windows, and other features. This plan should also include provisions for drainage and access points.
2. Check Local Codes and Permits: Before commencing any work, research local building codes and regulations. Many municipalities require permits for patio construction, especially when the patio is adjacent to a house. Ensure compliance with all applicable regulations to avoid potential fines or delays.
3. Assess the Site and Drainage: Evaluate the existing site conditions, paying close attention to the slope and drainage. The patio should slope away from the house to prevent water from pooling against the foundation. Ideally, a slope of 1/4 inch per foot is recommended. Identify any existing drainage issues and incorporate solutions into the design, such as French drains or surface drains, to effectively manage water runoff.
4. Gather Materials and Tools: Compile a comprehensive list of all necessary materials and tools. These typically include:
- Pavers: Choose pavers that are suitable for outdoor use and complement the style of the house.
- Base Material: Crushed stone or gravel is used to create a stable base for the patio.
- Sand: A layer of sand is used as a leveling bed beneath the pavers.
- Edging Material: Edging restraints are necessary to keep the pavers in place and prevent them from shifting over time.
- Geotextile Fabric: This fabric is placed between the soil and the base material to prevent soil erosion and maintain drainage.
- Compactor: A plate compactor is used to compact the base material and the sand layer.
- Level: A level is essential for ensuring that the patio surface is even.
- Measuring Tape: Accurate measurements are crucial for proper installation.
- Shovels and Rakes: Used for spreading and leveling materials.
- Wheelbarrow: To transport materials.
- Safety Glasses and Gloves: For personal protection.
- Circular Saw with Diamond Blade (Optional): For cutting pavers to fit irregular shapes.
- Rubber Mallet: For gently tapping pavers into place.
5. Excavate the Area: Excavate the area for the patio to the required depth. The depth will depend on the thickness of the pavers, the depth of the base material, and the depth of the sand layer. Generally, the total depth of excavation should be at least 8-12 inches. Be sure to remove any existing vegetation, topsoil, and debris.
6. Verify Proper Depth Against the Foundation: A critical step is ensuring the finished patio level is at least 6 inches below the finished siding or any weep holes in the brick/stone foundation. This prevents water from wicking up into the siding and foundation which can cause rot, mold, and structural damage. This may require more excavation than anticipated.
Key Point 2: Building a Solid Base
The base is the backbone of the paver patio. A well-constructed base provides stability, ensures proper drainage, and prevents settling or shifting of the pavers over time. The base typically consists of layers of geotextile fabric, compacted crushed stone, and a leveling bed of sand.
1. Install Geotextile Fabric: Line the excavated area with geotextile fabric. This fabric acts as a barrier between the soil and the base material, preventing soil particles from migrating into the base and compromising drainage. Overlap the edges of the fabric by at least 12 inches.
2. Add and Compact the Base Material: Spread the crushed stone or gravel evenly over the geotextile fabric to a depth of at least 4-6 inches. Use a plate compactor to compact the base material in several passes. Compaction is essential for creating a stable and uniform foundation. Add more base material as needed to achieve the desired depth and compaction.
3. Install Edging Restraints: Install edging restraints around the perimeter of the patio. Edging restraints are typically made of plastic, metal, or concrete and are designed to hold the pavers in place. Secure the edging restraints with stakes or spikes to prevent them from moving. Ensure the top of the edging restraint is slightly below the desired level of the pavers to allow for the sand leveling bed.
4. Apply and Level the Sand Layer: Spread a layer of sand evenly over the compacted base material to a depth of approximately 1 inch. Use a screed board or a similar tool to level the sand layer. The sand layer should be smooth, even, and free of any bumps or depressions. Compacting the sand is generally not recommended prior to laying pavers as it can make leveling more difficult.
Key Point 3: Paver Installation and Finishing Touches
With the base properly prepared, the next step involves laying the pavers according to the design plan. Precise placement and alignment are crucial for achieving a professional-looking patio. Once the pavers are in place, several finishing touches will enhance the stability and appearance of the patio.
1. Lay the Pavers: Begin laying the pavers according to the desired pattern. Start at one edge of the patio and work your way across, placing each paver snugly against the adjacent pavers. Use a rubber mallet to gently tap the pavers into place, ensuring they are level and aligned. Maintain a consistent joint spacing between the pavers. Use paver spacers if necessary, to maintain uniform spacing. If pavers need to be cut to fit around curves or edges, use a circular saw with a diamond blade. Always wear safety glasses when cutting pavers.
2. Address the Joint Between the Pavers and the House: This is a crucial area to consider. Ideally, a flexible sealant should be applied between the house foundation and the pavers to prevent water infiltration. This sealant should be designed for exterior use and capable of withstanding temperature fluctuations and movement. Alternatively, a narrow channel filled with gravel can be used to promote drainage away from the foundation. Consult with a professional for the best solution based on your specific situation.
3. Compact the Pavers: Once all the pavers are in place, use a plate compactor to compact the entire patio surface. This will help to set the pavers into the sand layer and ensure they are level and stable. Use a protective pad under the compactor to prevent scratching or damaging the pavers.
4. Add Joint Sand: Sweep joint sand into the joints between the pavers. Joint sand helps to stabilize the pavers and prevent weeds from growing in the joints. Use a broom to spread the sand evenly over the patio surface, working it into the joints. Repeat this process several times until the joints are completely filled. Consider using polymeric sand for added stability and weed control. Polymeric sand hardens when wetted, creating a more durable and weed-resistant surface.
5. Clean and Seal the Patio (Optional): After the joint sand is in place, clean the patio surface to remove any excess sand or debris. Consider sealing the pavers to protect them from staining and weathering. Sealing can also enhance the color of the pavers and make them easier to clean. Choose a sealant that is specifically designed for pavers and follow the manufacturer's instructions.
6. Ongoing Maintenance: Regular maintenance is essential for preserving the appearance and longevity of the patio. Sweep the patio regularly to remove dirt and debris. Clean spills immediately to prevent staining. Inspect the patio periodically for any signs of settling, shifting, or damage. Repair any damaged pavers or joints promptly to prevent further deterioration.
By following these steps carefully, homeowners can successfully install a beautiful and durable paver patio against their house. Remember that safety should always be a top priority, and it is advisable to seek professional assistance when needed.

Is It Possible To Install Pavers Against The House Foundation

Avoiding Disaster Through Proper Design Of A Raised Paver Patio

How To Install Concrete Pavers Ask This Old House

How To Install Pavers 15 Steps With S Wikihow

How To Build Walkways Around The House With Pavers Howtospecialist Step By Diy Plans

How To Build A Patio In Weekend Finegardening

How To Lay A Paver Walkway With Grass In Between

How To Build A Paver Patio Young House Love

How To Build A Paver Patio Young House Love

What Is The Best Base For Brick Pavers
Related Posts


