How To Install Outdoor Patio Shades
Outdoor patio shades are a great way to add privacy, protection from the sun, and style to your outdoor space. They come in a variety of materials, colors, and styles, so you can find ones that perfectly complement your home. Installing outdoor patio shades is a relatively simple process, but there are a few things you need to keep in mind to ensure a successful installation.
Here are the essential steps on how to install outdoor patio shades:
1. Choose the right type of shades
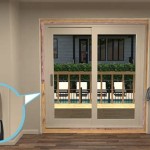
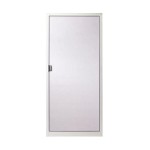
There are a few different types of outdoor patio shades to choose from, including: - Roller shades: These shades roll up and down on a roller, and are a good option for large areas. - Roman shades: These shades fold up and down in a series of horizontal folds, and are a good option for smaller areas. - Sliding shades: These shades slide open and closed on a track, and are a good option for areas where you need to be able to open and close the shades frequently.
2. Measure the area where you want to install the shades
Once you have chosen the type of shades you want, you need to measure the area where you want to install them. Make sure to measure the width and height of the area, and add a few inches to each measurement to allow for overlap.
3. Purchase the necessary materials
In addition to the shades themselves, you will need to purchase a few other materials, including: - Mounting brackets: These brackets will be used to attach the shades to the wall or ceiling. - Screws: You will need screws to attach the mounting brackets and the shades to the brackets. - A drill: You will need a drill to create pilot holes for the screws.
4. Install the mounting brackets
The first step is to install the mounting brackets. Hold the brackets in place against the wall or ceiling, and mark the locations of the holes. Drill pilot holes for the screws, and then screw the brackets into place.
5. Attach the shades to the brackets
Once the brackets are installed, you can attach the shades to them. Simply lift the shades into place, and then secure them to the brackets with screws.
6. Adjust the shades
Once the shades are installed, you need to adjust them so that they fit properly and operate smoothly. Start by adjusting the height of the shades. The bottom of the shades should hang about 6 inches above the floor.
Next, adjust the tension of the shades. The shades should be tight enough that they do not sag, but not so tight that they are difficult to operate.
Finally, adjust the tilt of the shades. The shades should be tilted at an angle that blocks the sun while still allowing you to see outside.
7. Enjoy your new shades!
Once you have adjusted the shades, you can sit back and enjoy your new outdoor oasis. Your shades will provide you with privacy, protection from the sun, and style for years to come.

Shade Sails An Easy Diy Guide To Installing Your Own Patio Shades Reviewed

Shade Sails An Easy Diy Guide To Installing Your Own Patio Shades Reviewed

How To Hang Coolaroo Patio Shade Add Privacy And Stay Cool

26 Patio Shade Ideas To Help You Stay Cool Timbertech

How Do You Install A Motorized Patio Screen Shading

10 Shade Ideas For Backyards Patios Extra Space Storage

12 Beautiful Shade Structures Patio Cover Ideas A Piece Of Rainbow

10 Shade Ideas For Backyards Patios Extra Space Storage

12 Beautiful Shade Structures Patio Cover Ideas A Piece Of Rainbow

The Best Patio Shades For Your Outdoor Space