How to DIY Stamped Concrete Patio
Are you ready to add a touch of elegance and style to your outdoor space? A stamped concrete patio is a great way to achieve a beautiful and durable surface that mimics the look of natural stone or brick. With a little planning and effort, you can create your own stamped concrete patio in just a few days.
Here's a step-by-step guide:
Step 1: Prepare the Ground
The first step is to prepare the ground for your patio. Clear away any vegetation or debris and level the ground. You may need to add or remove soil to create a level surface. Once the ground is level, compact it using a tamper or plate compactor.
Step 2: Build the Form
Next, you'll need to build a form for your patio. This will help to keep the concrete in place while it cures. The form can be made of wood or metal, and should be at least 2 inches high. Make sure the form is level and square, and that it extends beyond the edges of the patio by at least 6 inches.
Step 3: Pour the Concrete
Now it's time to pour the concrete. You can either mix the concrete yourself or order it pre-mixed from a concrete supplier. If you're mixing it yourself, follow the manufacturer's instructions carefully. Pour the concrete into the form and level it using a screed or trowel.
Step 4: Stamp the Concrete
Once the concrete has been poured and leveled, it's time to stamp it. This is the process of creating the desired pattern or texture on the surface of the concrete. There are a variety of stamps available, so you can choose the one that best suits your style. To apply the stamp, press it firmly into the concrete and hold it there for a few seconds. Repeat this process until the entire surface of the patio has been stamped.
Step 5: Cure the Concrete
Once the concrete has been stamped, it's important to let it cure properly. This will help to ensure that the concrete is strong and durable. Cover the patio with plastic sheeting and keep it moist for at least 7 days. After 7 days, you can remove the plastic sheeting and allow the patio to dry completely.
Step 6: Seal the Concrete
To protect your stamped concrete patio from the elements, it's a good idea to seal it. There are a variety of sealers available, so choose one that is specifically designed for concrete. Apply the sealer according to the manufacturer's instructions.
With a little planning and effort, you can create a beautiful and durable stamped concrete patio that will add value and beauty to your home for years to come.

Diy Stamped Concrete Patio How To Stamp By Budget101 Com

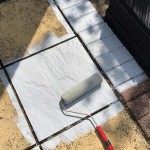
Gorgeous Diy Stamped Concrete Tile Driveway For Less Much Do It Yourself Fun Ideas

Diy Stamped Concrete Tile Tutorial Do It Yourself Fun Ideas

Diy Stamped Concrete Wood Patio Design

How To Stamp Concrete The Compete 11 Step Guide Photos

Diy Stamped Concrete Wood

Gorgeous Diy Stamped Concrete Tile Driveway For Less Much Do It Yourself Fun Ideas

Diy Fire Pit How To Build A Patio Nest For Less

Concrete Stamping For Patio Walkway Or Pavers How To Diy

Diy Concrete Stamp Made Simple


