How To DIY Concrete Patio
A concrete patio is a versatile addition to any backyard, providing a durable and low-maintenance space for entertaining, dining, or simply relaxing outdoors. Creating a DIY concrete patio can be a rewarding and cost-effective project for homeowners with some basic construction skills. This guide provides a step-by-step breakdown of the process, outlining essential considerations and techniques for achieving a successful outcome.
Planning and Preparation
Before breaking ground, careful planning is crucial to ensure a successful and enjoyable DIY concrete patio project. The following steps lay the foundation for a well-executed project:
- Determine the Size and Shape: Measure the desired area for the patio and consider the shape that best complements the existing landscape and architectural style of the home.
- Obtain Permits: Consult local building codes and obtain necessary permits to ensure compliance with regulations. This may involve securing permits for excavation, construction, and potentially utilities.
- Prepare the Site: Clear the area of vegetation, debris, and any existing structures. Level the ground using a laser level or traditional surveying methods.
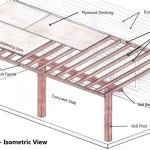
- Choose the Right Foundation: Evaluate soil conditions and select an appropriate foundation. For well-drained soil, a compacted gravel base is usually sufficient. For unstable soil, a reinforced concrete foundation may be necessary.
- Design the Layout: Map out the patio layout, including its shape, dimensions, and any features like steps, benches, or planters. Consider the flow of traffic and the placement of furniture.
- Gather Materials: Acquire the necessary materials, which include concrete mix, gravel, rebar (if needed), wood stakes, string, a trowel, a broom, a screed board, jointing tools, and waterproofing sealant.
Creating the Concrete Slab
Once the site is prepared, constructing the concrete slab is the core of the DIY patio project. This involves carefully mixing and pouring the concrete, ensuring proper compaction and finishing for a durable surface. The following steps outline this process:
- Frame the Patio: Use wood stakes and string to create the perimeter of the patio according to the design. Adjust the stakes to ensure level and square corners.
- Lay the Gravel Base: Spread a layer of gravel within the framed area, compacting it thoroughly. The depth of the gravel base should match the design specifications, typically around 4-6 inches.
- Install Rebar (If Needed): For larger or high-traffic patios, rebar reinforcement is recommended. Place rebar within the gravel base, ensuring it overlaps and is secured with wire ties.
- Mix the Concrete: Follow the manufacturer's instructions for mixing the concrete. Typically, a wheelbarrow, shovel, and water are used to achieve a consistent and workable mixture.
- Pour the Concrete: Gradually pour the concrete into the prepared area, ensuring it fills the entire space within the frame. Use a shovel to evenly distribute the concrete.
- Level and Smooth the Concrete: Use a screed board to level the concrete surface, creating a smooth and even layer. For a textured finish, use a broom to create patterns in the concrete surface.
- Cure the Concrete: Allow the concrete to cure properly by covering it with plastic sheeting and keeping it moist for at least 24 hours. This allows the concrete to develop its full strength.
Finishing Touches and Maintenance
After the concrete has cured, the final steps involve adding finishing touches and implementing ongoing maintenance practices to ensure the patio remains in top condition. Here are some essential points:
- Apply Waterproofing Sealant: Apply a layer of waterproofing sealant to protect the concrete from water damage, staining, and weathering. This will help preserve the integrity of the surface for years to come.
- Add Decorative Elements: Enhance the aesthetics of the patio with landscaping features, such as plants, flowers, lighting, or pathways. Consider adding furniture, cushions, and other outdoor amenities.
- Regular Cleaning and Maintenance: Clean spills promptly and sweep regularly to remove dirt and debris. Periodically apply a sealant or cleaner to protect the surface and maintain its appearance.

Diy Concrete Patio In 8 Easy Steps How To Pour A Cement Slab

Diy Concrete Patio How To Pour A Slab Bob Vila

Diy Concrete Patio How To Pour A Slab Bob Vila

How To Make A Nice Cement Patio Diy Concrete

Diy Concrete Patio How To Pour Your Own Slab Bn S

How To Plan Pour Your Diy Concrete Patio Liberty Ready Mix

Pouring Concrete Patio What Could Go Wrong With Doing It Yourself

Diy Stamped Concrete Patio How To Stamp By Budget101 Com

Resurfacing A Concrete Patio For Budget Diy Makeover Fab Everyday

Diy Concrete Patio Makeover The Frugal South
Related Posts