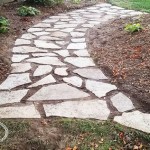
How to Cement Patio: A Step-by-Step Guide
Building a cement patio is an excellent way to enhance your outdoor space and create a perfect spot for entertaining, relaxing, or simply enjoying the fresh air. While it may seem like a challenging task, it is achievable with careful planning and execution. Here's a comprehensive guide to help you cement a patio like a pro.
Materials:
- Portland cement - Sand - Gravel - Concrete mix - Concrete colorant (optional) - Reinforcing mesh - Stakes - String - Square-edge shovel - Concrete mixer - Wheelbarrow - Trowel - Edger - Broom
Step 1: Preparation
Mark the desired patio area using stakes and string. Clear the area of any obstacles, including grass, vegetation, and loose soil. Excavate the ground according to the thickness of the patio you want, typically 4-6 inches.
Step 2: Base Layer
Spread a layer of gravel over the excavated area and tamp it firmly to create a stable base. This will prevent the concrete from settling unevenly. Over the gravel, lay a 2-inch thick layer of compacted sand.
Step 3: Frame and Reinforce
Install the reinforcing mesh over the sand base. This will prevent cracking. Secure the mesh to the ground using stakes or rebar anchors.
Step 4: Mix Concrete
In a concrete mixer or wheelbarrow, combine portland cement, sand, and water according to the manufacturer's instructions. If desired, add concrete colorant to achieve the preferred shade. Mix thoroughly until a workable consistency is achieved.
Step 5: Pour and Level
Pour the concrete into the prepared area and level it using a screed or a straight edge. Ensure the surface is smooth and even, sloping slightly away from the house to prevent water pooling.
Step 6: Trowel and Edge
Using a trowel, smooth the surface of the concrete and remove any excess material. Create edges around the perimeter of the patio using an edger to provide a clean and defined boundary.
Step 7: Broom Finish (Optional)
For a textured, non-slip surface, use a broom to brush the concrete while it is still wet. This creates a rougher texture that enhances traction.
Step 8: Curing
Cover the patio with plastic sheeting to retain moisture and prevent rapid drying. Keep it covered for at least 7 days, periodically misting the surface with water to ensure proper hydration. The concrete will gain strength and durability as it cures.
Tips:
- Use high-strength concrete mix for durability and longevity.
- Install control joints every 8-10 feet to prevent random cracking.
- Protect the newly laid concrete from rain and extreme temperatures.
- Seal the surface of the patio to protect it from stains and moisture.
By following these steps and tips, you can successfully cement a patio that will serve as an inviting and durable outdoor space for years to come.

Diy Concrete Patio In 8 Easy Steps How To Pour A Cement Slab

Backyard Stained And Stamped Concrete Patios

Pouring A Cement Patio Thehomesteadingboards Com

How To Lay A Patio On Concrete Or Over Paving Marshalls

Diy Concrete Patio In 8 Easy Steps How To Pour A Cement Slab

20 Design Ideas For Your Concrete Patio

Concrete Patio Ideas Design Your Backyard Network

Cement Patio Designs What Do You Recommend For Patios Enswmss Concrete Pavers Design Stones

Best Paint For A Concrete Patio The Money Pit
Moulliet Residence Decorative Concrete Flooring Photos Premier Veneers


