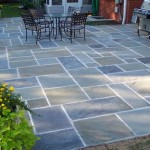
How to Border a Concrete Patio
Creating a beautiful and functional patio involves more than just pouring concrete. A well-designed border can elevate the space, defining its boundaries, adding visual appeal and enhancing the overall aesthetic. Whether you prefer a clean, modern look or a rustic charm, choosing the right border material and installation method is crucial.
Bordering a concrete patio can be a rewarding DIY project, allowing you to personalize your outdoor space. This article will provide a comprehensive guide to different border options, installation techniques, and essential tips for achieving a professional finish.
Choosing the Right Border Material
The selection of border material should align with your patio's design and functionality. Consider the following popular options:
- Stone: Natural stone offers durability and a timeless appeal, available in various colors and textures to complement different styles.
- Brick: A classic choice, bricks provide versatility and can be laid in various patterns to create unique designs.
- Pavers: Pavers are durable and offer a wide range of colors, shapes, and sizes, allowing for creative patterns.
- Wooden Planks: Wooden borders add a touch of warmth and rustic charm, but require regular maintenance to prevent weathering and decay.
- Metal: Metal borders, such as aluminum or steel, provide a modern and sleek look, often available in various finishes.
Factors to consider when choosing a material include:
- Budget: Different materials have varying costs.
- Maintenance: Some materials require more maintenance than others.
- Style: Choose a material that complements your patio's overall aesthetic.
- Durability: Select a material that can withstand weather conditions and foot traffic.
Installation Techniques
The installation method depends on the chosen border material and your desired look:
1. Setting the Border Using Concrete
This method is suitable for stone, brick, and pavers. It involves creating a concrete bed to support the border materials:
- Prepare the area: Clear the surrounding soil and mark the desired border location.
- Excavate a trench: Dig a trench, about 6-8 inches deep and wide enough to accommodate the border material and a layer of concrete.
- Lay the border: Position the border materials along the trench, ensuring proper alignment and level.
- Pour concrete: Fill the trench with concrete, leaving a small gap between the border and the concrete to allow for expansion and contraction.
- Curing: Allow the concrete to cure completely before applying pressure to the border.
2. Installing a Dry-Set Border
This method is suitable for pavers and some stone options that can interlock or be secured with mortar. It involves laying the border materials directly on top of a prepared base:
- Prepare the area: Level the ground and create a compacted base of gravel or crushed stone.
- Lay the border: Position the border materials on the base, ensuring proper alignment and level.
- Secure the border: Use mortar or interlocking mechanisms to secure the border materials.
- Backfill with soil or gravel: Fill the area behind the border with soil or gravel to create a stable base.
3. Using Pre-Made Border Kits
Pre-made border kits are available for various materials, offering a convenient and often simpler installation process. These kits typically come with pre-cut pieces and instructions, making installation easier for DIY enthusiasts.
Tips for a Professional Finish
To ensure a polished and durable border, follow these essential tips:
- Plan and Measure: Carefully measure and mark the desired border location to ensure accurate placement.
- Level the Ground: Ensure the ground is level before installing the border to prevent unevenness or settling.
- Use Mortar: Apply mortar to secure the border materials for added strength and stability.
- Allow for Expansion: Leave a small gap between the concrete and the border to accommodate expansion and contraction due to temperature changes.
- Maintain the Border: Regularly clean and maintain the border to prevent damage and preserve its beauty.
By following these guidelines, you can create a beautifully bordered patio that complements your outdoor space and provides a welcoming and enjoyable area for outdoor activities.

How To Frame A Stamped Concrete Patio Blackwater

Concrete Patio With Stamped Border Extension Ideas Cement

Decorative Concrete Border Construction In Minneapolis St Paul Mn

Stamped Concrete Patio With Border By Swiss Village Designs Design Brick Patios

Expert Concrete And Flatwork Services By Curb N Decor For Your Outdoor Living Space
Concrete Patio With A Rock Border Ok Diy Home Improvement Forum

Expert Concrete And Flatwork Services By Curb N Decor For Your Outdoor Living Space

Diy Concrete Patio In 8 Easy Steps How To Pour A Cement Slab

17 Best Patio Edging Ideas Backyard Landscaping Garden Design

Expert Concrete And Flatwork Services By Curb N Decor For Your Outdoor Living Space
Related Posts


