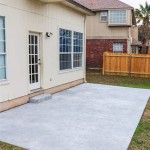
How Do You Build a Raised Concrete Patio?
A raised concrete patio can be a great addition to any home, providing a level and durable surface for outdoor entertaining. While it may seem like a daunting task, building a raised concrete patio is actually quite simple with the right tools and materials. Here are the essential steps to get you started.
Materials You'll Need
- Concrete mix
- Gravel
- Sand
- Pavers or flagstones
- Wood forms
- Rebar
- Wire mesh
- Level
- Trowel
- Tamper
- Edging
Step 1: Prepare the Ground
The first step is to prepare the ground where you will be building the patio. Clear the area of any vegetation and debris. Then, excavate the area to a depth of about 6 inches. Fill the excavated area with gravel and compact it firmly. This will provide a stable base for the concrete.
Step 2: Build the Forms
Next, you will need to build the forms that will hold the concrete in place. The forms can be made from wood or metal, and they should be set up around the perimeter of the patio. Make sure that the forms are level and securely fastened together.
Step 3: Install the Rebar
Rebar is a type of steel reinforcement that is used to strengthen concrete. Cut the rebar to the desired length and place it inside the forms. The rebar should be spaced evenly throughout the concrete, and it should be about 2 inches from the bottom and sides of the forms.
Step 4: Pour the Concrete
Once the rebar is in place, you can begin pouring the concrete. Mix the concrete according to the manufacturer's instructions and pour it into the forms. Use a trowel to smooth the concrete and remove any air bubbles. Once the concrete has been poured, use a tamper to compact it firmly.
Step 5: Finish the Concrete
After the concrete has been tamped, you can begin finishing it. Use a trowel to smooth the surface of the concrete and create a level finish. You can also add a decorative finish, such as a broom finish or a stamped finish.
Step 6: Cure the Concrete
Once the concrete has been finished, it is important to cure it properly. This will allow the concrete to gain strength and durability. Cover the concrete with plastic sheeting and keep it moist for at least 7 days. After 7 days, you can remove the plastic sheeting and allow the concrete to continue curing for another 28 days before using it.
Step 7: Install the Pavers or Flagstones
Once the concrete has cured, you can install the pavers or flagstones. Start by laying out the pavers or flagstones in a dry fit to make sure that they fit together properly. Once you are satisfied with the layout, you can begin setting the pavers or flagstones in place. Use a level to make sure that the pavers or flagstones are level, and tamp them firmly into place.
Step 8: Edging
Once the pavers or flagstones are in place, you can install the edging. Edging will help to hold the pavers or flagstones in place and prevent them from shifting. There are many different types of edging available, so choose the type that best suits your needs.
Conclusion
Building a raised concrete patio is a great way to add extra living space to your home. With the right tools and materials, you can build a beautiful and durable patio that you can enjoy for years to come.

Avoiding Disaster Through Proper Design Of A Raised Paver Patio

How To Build A Raised Patio

How To Build A Raised Concrete Porch Aaa Raising

How To Build A Raised Paver Patio Western Interlock

Crafted Work Raised Patio With 100 Retaining Wall

How To Build A Raised Patio With Retaining Wall Blocks

How To Build A Raised Patio On Permeable Base

How To Build A Raised Patio With Retaining Wall Blocks

Diy Raised Patio Part 1 3 Introduction Preparation Footings

13 Breathtaking Raised Patio Against House Designs To Create The Perfect Summer Vibe Kellyhogan


