Building a Brick Paver Patio: A Step-by-Step Guide
A brick paver patio can instantly elevate the look of your outdoor space, creating a durable and stylish area for entertaining, dining, or simply relaxing. This project, while seemingly daunting, can be tackled with the right planning and execution. Here's a comprehensive guide to building a brick paver patio from scratch.
1. Planning and Preparation
The first step is to meticulously plan the layout and dimensions of your patio. Consider the size and shape that best suits your needs and existing landscape. Additionally, visualize the desired location in relation to existing structures and landscaping features.
Following the planning stage, a critical preparatory step involves obtaining the necessary permits. Contact your local building department to understand any regulations regarding construction within your area. This ensures compliance and avoids potential complications later.
Next, prepare the site by clearing the area of any vegetation, debris, or existing structures. If necessary, remove topsoil to a depth suitable for the paver installation. This ensures a stable foundation for your patio.
2. Foundation and Base
A well-constructed foundation is crucial for ensuring the longevity and stability of your brick paver patio. This begins with excavating the area to a depth that accommodates the desired patio height, drainage, and the necessary base layers.
After excavation, install compacted gravel as a drainage layer, followed by a layer of compacted sand. This layered system facilitates proper drainage and provides a stable base for the pavers. The thickness of these layers depends on the specific requirements of the paver type and local soil conditions.
For further stability, consider implementing a perimeter restraint system. This can be accomplished using concrete edging, timber planks, or other appropriate materials to prevent the pavers from shifting or spreading over time.
3. Laying the Pavers
Once the foundation is prepared, the process of laying the pavers begins. This involves carefully selecting the pavers, ensuring consistency in size and color. The choice of paver type depends on personal preference, intended use, and budget.
Start laying the pavers from a central point or a focal point, working outwards. Use a string line as a guide to ensure the pavers are laid straight and level. For intricate designs, consider utilizing templates or pre-cut pavers.
Leave gaps between the pavers to allow for drainage and movement due to temperature variations. Fill these gaps with sand or polymeric sand, compacting the material to secure the pavers. This step is crucial for maintaining the aesthetic appeal and structural integrity of the patio.
4. Finishing Touches
After the pavers are laid and secured, final touches contribute to a polished and finished look. This includes cutting pavers to fit around intricate edges, corners, or irregular shapes. Utilize a specialized paver cutter or a wet saw for precise cuts.
Following the cutting, the patio requires a thorough cleaning to remove any debris, excess sand, or mortar residue. This ensures a clean and presentable surface. Finally, consider sealing the pavers with a suitable sealant. This helps protect the pavers from stains and moisture damage, enhancing their longevity and beauty.

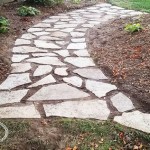
Brick Paver Patios

Our Process To Install A Brick Paver Patio In 5 Easy Steps Jm Mento Landscape Design

How To Build Brick Paving Patio In 9 Steps Oak Lawn Euro

How To Build A Small Paver Patio Diy For Around 200 Bucks

Building A Brick Paver Patio Step By Guide Diy Home Improvement Blog

Which Pavers Are Best For Patios Mortar City Masonry

How Much Does It Cost To Build A Paver Patio

How To Build A Paver Patio Young House Love

We Built A Paver Patio Like Pro Start To Finish

6 Benefits Of Installing A Brick Paver Patio Jindal Mechno Bricks