Building Your Own Concrete Patio: A Comprehensive Guide
A concrete patio offers a durable and versatile outdoor living space, providing an excellent foundation for entertaining, relaxing, and enjoying the outdoors. While professional installation is always an option, constructing a concrete patio yourself can be a cost-effective and rewarding project. This article provides a detailed guide to the process, outlining the essential steps and considerations for building a successful concrete patio.
Planning and Preparation
Before breaking ground, careful planning is crucial. This involves several key steps defining the project's scope and ensuring a structurally sound and aesthetically pleasing result.
First, determine the patio's location and size. Consider factors such as sunlight exposure, proximity to the house, existing landscaping, and intended use. A patio located on the south side of the house will receive the most sunlight, while a patio closer to the house offers easier access. Mark the intended patio area using stakes and string, allowing for slight adjustments as needed.
The next step involves checking local building codes and obtaining necessary permits. Requirements vary by municipality, and ensuring compliance from the outset avoids potential delays and fines later. Contact the local building department to inquire about permit requirements and any specific regulations regarding concrete patio construction.
Following the permit check, assess the site's drainage. Concrete patios should slope slightly away from the house to prevent water from pooling and potentially damaging the foundation. A slope of approximately 1/4 inch per foot is generally recommended. If the existing grade does not provide adequate drainage, adjustments will be necessary during excavation.
Finally, order the necessary materials and tools. This includes concrete mix (either pre-mixed or individual components), gravel base material, reinforcing materials (such as wire mesh or rebar), forms (typically lumber), a shovel, wheelbarrow, tamper, level, measuring tape, concrete float, concrete edger, concrete saw, and safety equipment (gloves, eye protection, and work boots). Calculate the amount of concrete needed based on the patio's dimensions and desired thickness (typically 4 inches). Overestimate slightly to account for waste.
Excavation and Base Preparation
Proper excavation and base preparation are critical for a stable and long-lasting concrete patio. The base provides support and prevents cracking and settling.
Begin by removing the topsoil and any vegetation within the marked patio area. Excavate to a depth of at least 6 inches below the desired finished height. This depth allows for a 4-inch gravel base and a 4-inch concrete slab, providing adequate structural support. Use a shovel and wheelbarrow to remove the excavated material.
Once excavation is complete, compact the subgrade soil using a tamper or plate compactor. This creates a solid foundation for the gravel base. Ensure the subgrade is level and free of any large rocks or debris. If the soil is particularly soft or unstable, consider using a geotextile fabric to prevent the gravel base from mixing with the underlying soil.
Next, spread a 4-inch layer of gravel base material over the compacted subgrade. Use a shovel to distribute the gravel evenly and then compact it using a tamper or plate compactor. The gravel base provides drainage and prevents frost heave, which can damage the concrete slab. Check the level of the gravel base using a level and adjust as needed to ensure a consistent and even surface.
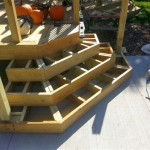
After compacting the gravel base, install the forms. These forms will contain the concrete while it cures and will define the patio's shape and dimensions. Use lumber to create the forms, ensuring they are sturdy and level. Secure the forms with stakes driven into the ground at regular intervals. Use a level to check the forms for plumb and adjust as needed. The top of the forms should be at the desired finished height of the concrete slab. Ensure the forms are properly sloped away from the house to promote water drainage.
Pouring and Finishing the Concrete
Pouring and finishing the concrete are the most technically challenging aspects of building a concrete patio. Careful attention to detail is required to achieve a smooth, durable, and aesthetically pleasing surface.
Before pouring the concrete, install reinforcing materials, such as wire mesh or rebar. These materials provide additional strength and prevent cracking. Place the wire mesh or rebar on top of the gravel base, ensuring it is properly supported. Use concrete chairs or small pieces of brick to elevate the reinforcing materials within the concrete slab. Overlap the edges of the wire mesh or rebar by at least 6 inches to create a continuous network.
Now it's time to mix and pour the concrete. If using pre-mixed concrete, follow the manufacturer's instructions for adding water and mixing. If mixing the concrete from individual components (cement, sand, and gravel), use a concrete mixer and follow a proper mix ratio (typically 1 part cement, 2 parts sand, and 3 parts gravel). Add water gradually until the concrete reaches a workable consistency. Avoid adding too much water, as this can weaken the concrete.
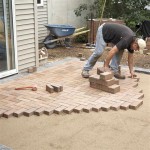
Pour the concrete into the forms, starting at one corner and working your way across the patio area. Use a shovel to distribute the concrete evenly and to fill any voids. Vibrate the concrete with a concrete vibrator to remove air pockets and consolidate the mixture. In the absence of a concrete vibrator, use a shovel to manually consolidate the concrete.
Once the concrete is poured and distributed, use a screed board to level the surface. A screed board is a long, straight board that is dragged across the top of the forms to remove excess concrete and create a level surface. Use a sawing motion to move the screed board across the forms, ensuring it remains in contact with the forms at all times. Fill any low spots with additional concrete and repeat the screeding process until the surface is level and smooth.
After screeding, use a concrete float to further smooth the surface. A concrete float is a flat, rectangular tool that is used to remove imperfections and create a uniform texture. Work the float in a circular motion, applying gentle pressure. The timing of this step is crucial; wait until the concrete has started to stiffen slightly before floating.
Next, use a concrete edger to round the edges of the patio. This prevents chipping and creates a more finished look. Run the edger along the inside of the forms, applying consistent pressure. After edging, use a concrete groover to create control joints. Control joints are shallow grooves that are cut into the concrete to control cracking. Space the control joints evenly across the patio, typically every 8 to 10 feet. Use a straight edge to guide the groover and ensure the joints are straight and consistent.
Finally, apply a desired finish to the concrete surface. A broom finish is a common and simple option. Drag a broom across the surface of the concrete to create a textured finish. Other options include stamped concrete, exposed aggregate, and colored concrete. Choose a finish that complements the surrounding landscape and architectural style.
Curing and Sealing
Proper curing and sealing are essential for maximizing the strength and durability of the concrete patio. Curing allows the concrete to hydrate properly, while sealing protects it from the elements.
Begin the curing process immediately after finishing the concrete. Curing involves keeping the concrete moist for several days to allow it to hydrate properly. This can be achieved by covering the concrete with plastic sheeting, burlap, or by spraying it with water regularly. The ideal curing period is at least 7 days. During this time, protect the concrete from direct sunlight and extreme temperatures.
After the concrete has cured, apply a concrete sealer. A concrete sealer protects the concrete from water, oil, and other stains. Choose a sealer that is appropriate for outdoor use and follow the manufacturer's instructions for application. Allow the sealer to dry completely before using the patio. Reapply the sealer every few years to maintain its protective properties.
Once the sealer is dry, remove the forms. Carefully pry the forms away from the concrete, being careful not to damage the edges. Backfill around the patio with soil and plant grass or other landscaping to blend the patio into the surrounding area. Clean up any debris and dispose of it properly.
Building a concrete patio is a significant undertaking, but with careful planning, proper preparation, and attention to detail, a durable and attractive outdoor space can be created. Following the steps outlined in this article will provide a solid foundation for a successful project.

Diy Concrete Patio In 8 Easy Steps How To Pour A Cement Slab

Diy Concrete Patio How To Pour Your Own Slab Bn S

Pouring Concrete Patio What Could Go Wrong With Doing It Yourself

Diy Concrete Patio How To Pour A Slab Bob Vila

Diy Concrete Patio Makeover The Frugal South

How To Make A Nice Cement Patio Diy Concrete

Resurfacing A Concrete Patio For Budget Diy Makeover Fab Everyday

Quikrete Building A Concrete Patio

How To Make A Quikrete Walkmaker Patio

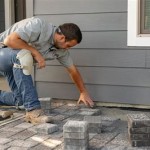
Diy Broken Concrete Patio Urbanite Full Tutorial An Oregon Cottage
Related Posts