Sun Shade Sail Patio Ideas: A DIY Guide to Stylish Shade
Sun shade sails have become increasingly popular as a stylish and effective solution for providing shade and protection from the sun's harmful UV rays in outdoor spaces. Their versatility, aesthetic appeal, and relative ease of installation make them an attractive option for homeowners looking to enhance their patios, decks, and gardens. This article explores various DIY sun shade sail patio ideas, offering practical guidance and inspiration for creating a comfortable and visually appealing outdoor retreat.
The appeal of sun shade sails lies in their ability to transform an otherwise exposed area into a shaded oasis. They come in a variety of shapes, sizes, and colors, allowing for customization to suit individual preferences and architectural styles. Furthermore, the DIY aspect provides a sense of accomplishment and cost-effectiveness, allowing homeowners to tailor the installation to their specific needs and budget.
Before embarking on a DIY sun shade sail project, careful planning and consideration are crucial. Factors such as the size and shape of the patio, the amount of shade desired, prevailing wind conditions, and the structural integrity of existing support points must be assessed. A well-thought-out plan will not only ensure a successful installation but also maximize the functionality and longevity of the shade sail.
Key Point 1: Planning and Design Considerations
The initial stage of any DIY project involves meticulous planning. For sun shade sails, this includes evaluating the patio space, determining the desired level of shade, and choosing the appropriate sail shape and size. The location of the sun throughout the day should be observed to identify areas that require the most shade. This information will inform the placement and angle of the shade sail.
Shapes commonly available include triangles, squares, and rectangles. Triangular sails are often used to create a dynamic and modern aesthetic, while square and rectangular sails offer more comprehensive coverage. The choice of shape will depend on the specific dimensions of the patio and the desired visual effect. Furthermore, overlapping multiple sails can create intricate shade patterns and add visual interest.
The size of the shade sail must be carefully considered to ensure adequate coverage without overwhelming the space. Too small a sail will provide insufficient shade, while too large a sail may create an enclosed and claustrophobic feel. It is advisable to measure the patio area accurately and use a scale drawing to visualize the placement of the sail before making a purchase.
Material selection is another crucial aspect of the planning process. Sun shade sails are typically made from high-density polyethylene (HDPE) fabric, which is UV-resistant, waterproof, and breathable. The weight and density of the fabric will determine its strength and durability. Heavier fabrics generally offer better protection from the sun and withstand stronger winds. Color choice should also be considered, as darker colors provide more shade but may also absorb more heat.
Once the shape, size, and material have been selected, the next step is to determine the support points for the shade sail. Existing structures, such as walls, trees, or posts, can be utilized as anchor points. However, it is essential to ensure that these structures are strong enough to withstand the tension of the sail, especially in windy conditions. If existing structures are not suitable, new posts may need to be installed. These posts should be made of sturdy materials such as steel or treated wood and should be securely anchored in the ground.
The placement of the support points will significantly impact the effectiveness and aesthetics of the shade sail. They should be positioned to create the desired angle and tension in the sail, ensuring that it provides adequate shade and looks visually appealing. It is recommended to consult with a professional if there are any concerns about the structural integrity of the support points.
Key Point 2: Installation Techniques and Hardware
The installation of a sun shade sail requires careful attention to detail to ensure a secure and long-lasting result. The necessary hardware includes turnbuckles, pad eyes, snap hooks, and rope or cable. Turnbuckles are used to adjust the tension of the sail, pad eyes are attached to the support points to provide anchor points, and snap hooks connect the sail to the pad eyes. Rope or cable is used to extend the reach of the sail if the support points are too far apart.
Before beginning the installation, it is crucial to ensure that all the necessary tools and materials are readily available. These may include a drill, level, measuring tape, wrench, and safety glasses. It is also advisable to have an assistant to help with lifting and positioning the sail.
The first step is to attach the pad eyes to the support points. This may involve drilling holes into walls or posts and securing the pad eyes with bolts or screws. The pad eyes should be installed at the correct angle to ensure that the sail can be properly tensioned. A level should be used to ensure that the pad eyes are aligned.
Once the pad eyes are installed, the next step is to attach the turnbuckles to the pad eyes. The turnbuckles should be adjusted to their loosest setting to allow for easy attachment of the sail. The snap hooks are then attached to the corners of the shade sail.
With the turnbuckles and snap hooks in place, the sail can be lifted into position and attached to the pad eyes. This may require some effort, especially with larger sails. It is essential to ensure that the sail is properly aligned before fully tensioning it.
Once the sail is attached, the turnbuckles can be tightened to create the desired tension. The tension should be evenly distributed across all corners of the sail to prevent sagging or distortion. It is important not to overtighten the turnbuckles, as this can damage the sail or the support points. A moderate amount of tension is sufficient to keep the sail taut and prevent it from flapping in the wind.
After the sail is fully installed, it should be inspected for any signs of damage or stress. The tension should be checked periodically and adjusted as needed. In areas with strong winds, it may be necessary to remove the sail during severe weather to prevent damage.
Key Point 3: Creative Design Ideas and Enhancements
Beyond the functional aspects of sun shade sails, there are numerous creative design ideas that can enhance their aesthetic appeal and integrate them seamlessly into the patio environment. The choice of color, shape, and arrangement can significantly impact the overall look and feel of the outdoor space.
One popular design idea is to use multiple shade sails of different colors and shapes to create a visually dynamic and engaging effect. This can be achieved by overlapping the sails or arranging them in a staggered pattern. The use of contrasting colors can add a bold and modern touch, while the use of complementary colors can create a more harmonious and relaxing atmosphere.
Another creative approach is to integrate the shade sails with existing landscaping features. For example, the sails can be positioned to provide shade for a specific plant or garden area. Climbing plants can be trained to grow along the edges of the sail, adding a natural and organic element to the design.
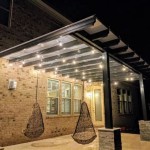
Lighting can also be used to enhance the ambiance of the shaded patio area. String lights can be draped along the edges of the sail, creating a warm and inviting glow. Spotlights can be used to highlight specific features of the sail, such as its shape or color. The use of colored lights can add a festive and playful touch.
In addition to lighting, other decorative elements can be incorporated into the design. Wind chimes can be hung from the sail, creating a soothing and relaxing sound. Decorative banners or flags can be attached to the sail, adding a personal and whimsical touch. The possibilities are endless, limited only by imagination and creativity.
Furthermore, the shaded area can be furnished with comfortable seating and outdoor accessories to create a welcoming and functional space. Outdoor sofas, chairs, and tables can be arranged to create a cozy and inviting atmosphere. Outdoor rugs, cushions, and pillows can add color and texture to the space. The addition of a small outdoor bar or grilling area can further enhance the functionality and enjoyment of the patio.
Finally, consider the practicality of retractable shade sails. While more complex in installation, these allow for adjustment based on the time of day and weather conditions, offering optimal shade control and flexibility. Retractable systems often require professional installation or a more advanced DIY skillset.

12 Beautiful Shade Structures Patio Cover Ideas A Piece Of Rainbow

Shade Sails An Easy Diy Guide To Installing Your Own Patio Shades Reviewed

Patio Shade How To My Outdoor Living Tips

12 Beautiful Shade Structures Patio Cover Ideas A Piece Of Rainbow

4 Backyard Shade Ideas To Spruce Up Your Space

Diy Trampoline Fort

How To Make Diy Outdoor Shade Poles Amylanham Com

10 Inspiring Diy Canopies Sunshades

Sun Shade Sail Installation Ideas 9 Diy Tips To Make Your Soar Outsidemodern

Patio Cover Ideas The Home Depot
Related Posts

