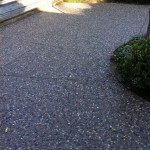
Stamped Cement Patios: A Step-by-Step Guide to Create an Enduring Outdoor Haven
Transform your outdoor space into an elegant and durable oasis with a stamped cement patio. This cost-effective and versatile material mimics the look of natural stone, brick, or wood while providing exceptional longevity and low maintenance. Here's a comprehensive guide to guide you through the process of creating a stunning stamped cement patio.
Materials and Tools
- Concrete mix
- Stamped concrete mats
- Release agent
- Color hardener
- Sealer
- Trowel
- Edger
- Broom
- Tamper
Step 1: Prepare the Subgrade
Excavate the area where the patio will be located to a depth of 6-8 inches. Compact the soil to provide a stable base for the concrete. Add gravel or crushed stone to a depth of 4-6 inches and compact again.
Step 2: Form the Perimeter
Install wooden forms around the perimeter of the excavation to contain the concrete. Ensure they are level and securely staked.
Step 3: Lay the Concrete
Mix the concrete according to the manufacturer's instructions and pour it into the forms. Use a trowel to level and smooth the surface. Allow the concrete to set for 1-2 hours before proceeding.
Step 4: Apply Release Agent
Spray a release agent onto the surface of the concrete to prevent the stamps from sticking. Allow it to dry according to the manufacturer's directions.
Step 5: Color the Concrete
Sprinkle color hardener evenly over the concrete while it is still wet. This will add pigment and enhance the final appearance of the patio.
Step 6: Tamp the Concrete
Use a tamper to compact the concrete and remove any air pockets. Tamp until the surface is firm and consolidated.
Step 7: Stamp the Concrete
Place the stamped concrete mats over the tamped concrete and press them firmly into the surface. Use an edger to create clean lines around the edges of the patio.
Step 8: Remove Stamps
Gently lift the stamps to reveal the imprinted design. Brush away any excess concrete.
Step 9: Clean and Seal
Once the concrete has cured for 24 hours, wash the patio with water to remove any remaining release agent or color hardener. Apply a sealer to protect the surface and enhance its durability.
Conclusion
With patience and attention to detail, you can create a beautiful and long-lasting stamped cement patio that will enhance the aesthetic appeal of your outdoor space for years to come. Remember to consult with a professional if you require additional guidance or encounter any unexpected challenges.

Diy Stamped Concrete Patio How To Stamp By Budget101 Com

Gorgeous Diy Stamped Concrete Tile Driveway For Less Much Do It Yourself Fun Ideas

Diy Stamped Concrete Patio How To Stamp By Budget101 Com

Diy Fire Pit How To Build A Patio Nest For Less

Concrete Stamping For Patio Walkway Or Pavers How To Diy

Diy Concrete Patio In 8 Easy Steps How To Pour A Cement Slab

Gorgeous Diy Stamped Concrete Tile Driveway For Less Much Do It Yourself Fun Ideas

How To Stamp Concrete Decorative Patio Houselogic

Diy Stamped Concrete Wood

Diy Stamped Concrete Patio How To Stamp By Budget101 Com


