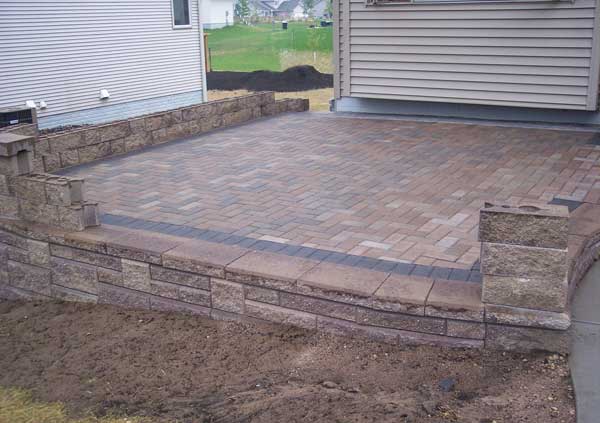
How To Build A Paver Patio On Uneven Ground
Constructing a paver patio can significantly enhance outdoor living space, providing an aesthetic and functional area for relaxation and entertainment. However, uneven ground presents unique challenges that must be addressed meticulously to ensure a stable and visually appealing final product. This article outlines the process of building a paver patio on uneven terrain, focusing on proper site preparation, leveling techniques, and paver installation.
Addressing Uneven Terrain: Site Preparation and Excavation
The initial phase of building a paver patio on uneven ground involves thorough site preparation. This process begins with clearing the area of all vegetation, including grass, weeds, and any existing debris such as rocks, roots, and old landscaping materials. Removing these elements is crucial for creating a clean and stable base upon which the patio will be built.
Following the clearing process, the next step involves determining the desired height and dimensions of the patio. It's important to consider factors such as drainage, proximity to the house, and surrounding landscape features. Establish a level reference point using a string line stretched between two stakes. Utilize a line level to ensure the string is perfectly horizontal. This line will serve as a benchmark for all subsequent leveling operations.
Excavation is the next critical task. The depth of excavation depends on the severity of the unevenness and the planned layering of the patio base. A general rule of thumb is to excavate deep enough to accommodate the paver thickness, a layer of bedding sand (typically 1 inch), and a compacted base layer of gravel (typically 4-6 inches). However, in areas with significant elevation differences, deeper excavation may be necessary to create a level subgrade.
During excavation, it is imperative to maintain a consistent slope for proper drainage. A slope of approximately 1/8 inch per foot away from the house is generally recommended. Mark the desired slope using stakes and string lines. Utilize a laser level or transit to ensure accurate gradients. The excavated soil should be removed from the site or repurposed elsewhere in the landscape.
Once the excavation is complete, the subgrade (the exposed soil at the bottom of the excavation) needs to be compacted. This can be achieved using a plate compactor. Compaction is essential to create a stable foundation that minimizes settling and shifting of the pavers over time. Pay particular attention to areas where significant fill has been added to level the ground.
Creating a Level Base: Gravel and Bedding Sand
After compacting the subgrade, the next step is to build a stable and level base layer using gravel. This layer serves as a drainage medium and provides a solid foundation for the pavers. Choose a gravel that is well-graded and angular, such as crushed stone or road base. These types of gravel interlock effectively, creating a strong and stable base.
Spread the gravel evenly across the excavated area, ensuring a consistent depth throughout. For areas with significant elevation differences, it may be necessary to use varying thicknesses of gravel to achieve a level surface. Utilize a wheelbarrow and shovel to distribute the gravel, and then use a rake to create a smooth and even layer.
Compaction is again crucial after spreading the gravel. Use a plate compactor to thoroughly compact the gravel layer. This will help to interlock the gravel particles and create a dense and stable base. Multiple passes with the compactor may be necessary, especially in areas with thicker gravel layers.
Following the gravel layer, a layer of bedding sand is required. This layer provides a smooth and level surface upon which the pavers will be laid. Use coarse sand, often referred to as paver sand or concrete sand. Avoid using fine sand, as it can wash away easily and compromise the stability of the patio.
Spread the bedding sand evenly over the compacted gravel layer. The thickness of the sand layer should be approximately 1 inch. Use screed rails or pipes to create a level surface. Place the rails or pipes parallel to each other and use a level to ensure they are perfectly horizontal. Then, use a screed board to drag the sand across the rails, creating a smooth and even surface. Remove the screed rails and fill in the gaps with sand, using a hand tamper to compact the sand lightly.
Paver Installation: Laying and Securing the Patio
With the base properly prepared and leveled, the paver installation can begin. Start by selecting a paver pattern that is aesthetically pleasing and structurally sound. Common paver patterns include running bond, herringbone, and basketweave. The choice of pattern will depend on personal preference and the shape and size of the pavers.
Begin laying the pavers along one edge of the patio, working outwards. Place each paver carefully onto the prepared sand bed, ensuring it is level and aligned with the adjacent pavers. Use a rubber mallet to gently tap the pavers into place. Avoid using excessive force, as this can damage the pavers.
Maintain consistent spacing between the pavers. This spacing is typically about 1/8 to 1/4 inch, depending on the paver type and the desired aesthetic. Use paver spacers to ensure uniform spacing. As the pavers are laid, periodically check the level and alignment using a level and a string line. Make any necessary adjustments to ensure a consistent and even surface.
When the paver installation is complete, the next step is to fill the joints between the pavers with paver sand. Use a broom to sweep the sand into the joints, ensuring they are completely filled. Multiple passes with the broom may be necessary.
After filling the joints with sand, use a plate compactor with a protective pad to compact the pavers and set them firmly into the sand bed. This will help to interlock the pavers and prevent them from shifting over time. Make several passes with the compactor, ensuring the entire patio surface is compacted.
Finally, add a border around the perimeter of the paver patio. The border can be made of various materials, such as concrete edging, brick, or natural stone. The border serves to contain the pavers and prevent them from shifting outwards. Secure the border in place using concrete or landscape adhesive.
Once the bordering is complete, the paver patio is ready for use. Regular maintenance, such as sweeping and occasional cleaning, will help to keep the patio looking its best for years to come. Periodically check the joints between the pavers and refill them with sand as needed to maintain stability.
Building a paver patio on uneven ground requires careful planning, meticulous execution, and attention to detail. By following the steps outlined in this article, it is possible to create a beautiful and durable outdoor living space that will enhance the enjoyment of your property.

How To Fix Uneven Patio Pavers

How To Build A Raised Patio With Retaining Wall Blocks

Paver Stone Patio Tutorial For Beginners To Intermediates

How To Install Patio Pavers Over An Existing Concrete Slab

Build It Yourself A Guide To Paver Patio Construction Earthworks Landscaping

How To Level Uneven Brick Pavers S

How To Install Pavers On Unlevel Ground Hunker

Laying Patio Pavers Polycor Inc

Retaining Walls Make Beautiful Raised Patios

Back Yard Patio On Sloped Terrain Small Garden Backyard
Related Posts


