How To Build A Pergola On An Existing Patio
Adding a pergola to an existing patio can dramatically enhance its aesthetic appeal and functionality. A pergola provides shade, defines outdoor spaces, and offers a structure for climbing plants, transforming a simple patio into an inviting outdoor living area. This article details the process of building a pergola on an existing patio, covering planning, materials, construction, and important considerations to ensure a successful and lasting build.
Planning and Design
Effective planning is crucial for the success of any construction project, and a pergola is no exception. This phase involves determining the pergola's size, style, and placement, as well as ensuring compliance with local building codes and regulations. Failure to plan effectively can result in structural issues, code violations, and aesthetic disappointments.
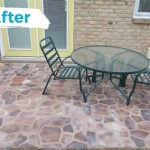
The initial step involves assessing the existing patio. Consider its dimensions, material (concrete, pavers, etc.), and overall layout. The size of the pergola should be proportional to the patio and the surrounding landscape. A pergola that is too large may overwhelm the space, while one that is too small may appear insignificant.
Next, define the purpose of the pergola. Is it primarily for shade, aesthetic enhancement, or a combination of both? This will influence the design and materials chosen. For shade, consider a denser roof structure or the addition of climbing plants. For aesthetic purposes, the design can be more open and decorative.
Style is another crucial element. Common pergola styles include traditional, contemporary, and rustic. A traditional pergola often features classic lines and intricate details, while a contemporary pergola typically has a more minimalist design with clean lines and geometric shapes. A rustic pergola may incorporate natural materials like rough-hewn wood and incorporate a more organic feel.
It is imperative to check local building codes and regulations before commencing construction. Many municipalities require permits for structures of a certain size or height. Failing to obtain the necessary permits can result in fines and even the requirement to dismantle the structure. Contact the local building department to inquire about specific requirements and obtain the necessary permits prior to beginning any work.
Once the design is finalized, create a detailed plan that includes dimensions, materials list, and construction steps. This plan will serve as a roadmap throughout the construction process and help ensure accuracy and efficiency. A detailed plan also facilitates accurate material ordering and cost estimation.
Materials and Tools
Selecting the right materials and tools is essential for building a durable and aesthetically pleasing pergola. The choice of materials will impact the pergola's appearance, longevity, and maintenance requirements. Similarly, having the appropriate tools will streamline the construction process and ensure accurate and safe assembly.
Common materials for pergola construction include wood, vinyl, and metal. Wood offers a natural aesthetic and is relatively easy to work with, but requires regular maintenance to prevent rot and insect damage. Cedar and redwood are popular choices due to their natural resistance to these elements. Pressure-treated lumber is another option but may require staining or painting to achieve the desired look. Vinyl is a low-maintenance option that is resistant to rot and insects, but it may not have the same natural aesthetic as wood. Metal, such as aluminum or steel, is durable and requires minimal maintenance, but can be more expensive and may require specialized tools for cutting and welding.
Consider the existing patio material when selecting the pergola's materials. Matching or complementing the patio's aesthetic will create a cohesive and visually appealing outdoor space.
A comprehensive list of tools is necessary for building a pergola. This list should include:
- Measuring tape
- Level
- Circular saw
- Drill/driver
- Impact driver
- Post hole digger (if setting posts in the ground)
- Concrete mix (if setting posts in the ground)
- Safety glasses
- Gloves
- Clamps
- Ladders
- Fasteners (screws, bolts, nails)
Ensure all tools are in good working condition and that you are familiar with their proper and safe operation. Safety should be a top priority throughout the construction process.
Construction Process
The construction process involves several key steps, including setting the posts, attaching the beams, installing the rafters, and adding any desired decorative elements. Each step requires careful attention to detail to ensure the pergola is structurally sound and aesthetically pleasing.
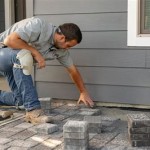
The first step is setting the posts. This is the foundation of the pergola and must be done accurately. There are two common methods for setting posts on an existing patio: surface mounting and setting posts in the ground. Surface mounting involves attaching the posts to the patio using metal brackets and concrete anchors. This method is suitable for patios constructed of solid concrete and offers easier installation. Setting posts in the ground involves cutting away sections of the patio to dig post holes and setting the posts in concrete. This method provides greater stability but requires more extensive work.
For surface mounting, use heavy-duty metal post bases designed for pergola construction. Attach the post bases to the patio using concrete anchors, ensuring they are level and properly aligned. For setting posts in the ground, dig post holes to a depth of at least one-third the height of the post. Pour concrete into the holes, ensuring the posts are plumb and properly supported until the concrete sets.
Once the posts are securely in place, the next step is attaching the beams. Beams are horizontal support structures that run along the top of the posts, providing structural support for the rafters. Attach the beams to the posts using screws or bolts, ensuring they are level and securely fastened.
Next, install the rafters. Rafters are horizontal pieces of lumber that run across the beams, creating the pergola's roof structure. The spacing between rafters will depend on the desired level of shade and the overall aesthetic of the pergola. Attach the rafters to the beams using screws or nails, ensuring they are evenly spaced and securely fastened.
Consider adding decorative elements to enhance the pergola's aesthetic appeal. This may include adding lattice panels, decorative end caps to the rafters, or installing climbing plants.
Climbing plants, such as wisteria, clematis, or honeysuckle, can add beauty and natural shade to the pergola. Install trellises or wires to support the plants as they grow. Select plants that are appropriate for your climate and provide the desired aesthetic.
Regularly inspect the pergola for signs of wear and tear and perform necessary maintenance to ensure its longevity. This may include cleaning the wood, tightening fasteners, and treating the wood with preservatives or stain. Maintaining the pergola will preserve its appearance and structural integrity for years to come.
Addressing Common Challenges
Building a pergola on an existing patio can present several challenges. These challenges may include uneven patio surfaces, dealing with existing utilities, and ensuring proper drainage.
An uneven patio surface can make it difficult to set the posts level. To address this issue, use shims to level the post bases or adjust the height of the posts as needed. A level surface is crucial for ensuring the pergola is structurally sound and aesthetically pleasing.
Before digging any post holes, carefully inspect the area for underground utilities such as gas lines, water pipes, and electrical conduits. Contact the local utility companies to locate and mark any underground utilities to avoid accidental damage during construction.
Proper drainage is essential for preventing water damage to the pergola and the patio. Ensure the area around the pergola slopes away from the house to allow water to drain away. Consider adding drainage channels or gravel beds to improve drainage in areas prone to water accumulation. Proper drainage will help prevent rot and decay in the pergola's wood components.
When working with wood, it is essential to protect it from the elements. Apply a sealant, stain, or paint to protect the wood from moisture, UV rays, and insects. Regularly inspect the wood for signs of damage and perform necessary repairs promptly. Protecting the wood will extend the pergola's lifespan and maintain its appearance.
Consider the wind load when designing and building the pergola. Strong winds can exert significant force on the structure, potentially causing damage or collapse. Ensure the posts are securely anchored and the rafters are adequately supported to withstand wind loads. In areas prone to high winds, consider adding additional bracing or reinforcement to the pergola.

Build A Patio Pergola Attached To The House Houseful Of Handmade

Building A Wood Pergola Diy Tips Cedar Construction

How To Build A Pergola Plans Diy Family Handyman

Building A Pergola What You Ll Need Fine Homebuilding

Build A Patio Pergola Attached To The House Houseful Of Handmade

How To Build A Pergola On An Existing Deck Google Search Patio Designs Backyard

How To Build A Pergola On Deck Remodelaholic

How Pergola Planner Helped Turn My Pas Patio Into An Oasis Building Strong

How To Build A Pergola On Concrete Patio In Two Days 18 Steps With S Instructables

How To Build A Pergola On Cement Patio
Related Posts