Patio Channel Drain Installation: A Comprehensive Guide
Patio channel drain installation is a crucial aspect of landscape design and management, particularly in regions with significant rainfall or where proper drainage is essential to prevent water damage. Effective patio drainage systems safeguard against flooding, erosion, and the deterioration of patio materials, ultimately prolonging the lifespan and usability of outdoor spaces. This article provides a detailed guide to understanding, planning, and executing a patio channel drain installation project, covering essential considerations, necessary materials, step-by-step procedures, and maintenance recommendations.
Understanding the Need for Patio Channel Drains
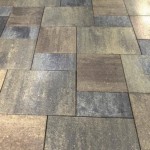
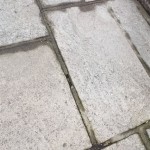
The primary function of a patio channel drain is to efficiently collect and redirect surface water away from the patio area. Without adequate drainage, rainwater, snowmelt, or even excessive irrigation can accumulate, leading to several potential problems. These include water pooling, which can create slippery and hazardous surfaces, especially during freezing temperatures. Standing water can also contribute to the growth of mold, mildew, and algae, compromising the aesthetic appeal and hygiene of the patio. Furthermore, prolonged exposure to moisture can accelerate the degradation of patio materials such as pavers, concrete, and natural stone. In extreme cases, water infiltration can damage the underlying foundation of the patio, resulting in costly repairs.
Patio channel drains are particularly beneficial in areas with heavy rainfall, poorly draining soil, or patios located near building foundations where water runoff poses a threat to structural integrity. They can also be strategically placed to manage water flow from downspouts, preventing erosion and directing water towards designated drainage areas such as rain gardens or storm sewers.
The type of patio and the surrounding landscape will dictate the specific drainage needs. Large patios require more extensive drainage solutions than smaller ones. Patios constructed with impermeable materials like concrete require more efficient drainage systems than those built with porous pavers that allow some water to seep into the ground. The slope of the patio and the surrounding ground also play a crucial role in determining the appropriate placement and capacity of the channel drain system.
Planning and Preparation: Essential Steps Before Installation
Thorough planning is paramount to a successful patio channel drain installation. This phase involves assessing the drainage requirements, selecting the appropriate materials, and preparing the installation site. Skipping or neglecting these steps can lead to performance issues, costly rework, and long-term maintenance complications.
The initial step is to determine the volume of water that needs to be managed. This can be estimated based on local rainfall data, the size of the patio, and the surrounding landscape's contribution to runoff. Consult local building codes to ensure compliance with drainage regulations. These codes often specify minimum drainage requirements based on the area's geographical location and climate.
Next, select the appropriate channel drain system. Channel drains are available in various materials, including polymer concrete, plastic, and metal. Polymer concrete drains are known for their durability and resistance to corrosion, making them suitable for high-traffic areas and harsh environmental conditions. Plastic drains are a more cost-effective option for lighter-duty applications. Metal drains, typically made of stainless steel or cast iron, are often used in industrial or commercial settings where high strength and chemical resistance are required.
Consider the grating material and design. Grates are available in a variety of styles, including slotted, perforated, and decorative designs. The grating should be selected based on its hydraulic capacity, aesthetic appeal, and ability to prevent debris from entering the drain. Larger slots or perforations allow for faster water flow, while tighter designs can prevent leaves, twigs, and other debris from clogging the system. The grate material should also be durable and resistant to corrosion and UV exposure.
Prepare the installation site by excavating a trench along the perimeter of the patio or in areas where water tends to accumulate. The trench should be deep and wide enough to accommodate the channel drain and a layer of bedding material. Ensure the trench has a consistent slope towards the outlet, which should be connected to a storm sewer, dry well, or other designated drainage area. The slope is crucial for ensuring efficient water flow through the channel drain.
Gather the necessary tools and materials. These typically include a shovel, pickaxe, level, measuring tape, concrete saw, tamper, gravel or crushed stone for bedding, concrete mix, and sealant. Ensure all tools are in good working condition and that you have an adequate supply of materials before starting the installation process. Ordering extra materials is recommended to account for potential waste or errors.
Step-by-Step Installation Process
The actual installation process involves setting the channel drain, connecting it to the drainage system, and backfilling the trench. Precision and attention to detail are crucial to ensure the system functions correctly and seamlessly integrates with the patio's surface.
Begin by laying a layer of gravel or crushed stone at the bottom of the trench. This bedding material provides a stable base for the channel drain and helps to improve drainage around the system. Compact the bedding material using a tamper to create a smooth and even surface. The thickness of the bedding layer will vary depending on the soil conditions and the manufacturer's recommendations.
Position the channel drain sections within the trench, ensuring they are aligned and properly connected according to the manufacturer's instructions. Most channel drain systems have interlocking sections that snap or bolt together. Pay close attention to the direction of flow, ensuring that the outlet is facing the designated drainage area. Use a level to ensure that each section is properly aligned and that the slope is consistent throughout the system. Slight adjustments can be made by adding or removing bedding material.
Connect the channel drain outlet to the drainage system. This typically involves using a connector pipe and fittings to link the drain to a storm sewer, dry well, or other drainage outlet. Ensure that the connection is watertight to prevent leaks and water infiltration. Use sealant or waterproof tape to seal any joints or connections. The drainage pipe should have a consistent slope away from the channel drain to facilitate water flow.
Backfill the trench around the channel drain with concrete mix. The concrete should be poured in layers and compacted to ensure that it fully supports the drain and prevents shifting or settling. Use a trowel to smooth the concrete surface and create a seamless transition between the drain and the patio surface. The concrete should be flush with the surrounding patio material to prevent tripping hazards or uneven surfaces.
Allow the concrete to cure according to the manufacturer's instructions. This typically takes several days, during which the concrete should be kept moist to prevent cracking. Avoid walking or placing heavy objects on the concrete until it is fully cured. Covering the concrete with plastic sheeting can help to retain moisture and promote proper curing.
Once the concrete is cured, install the grating. Ensure that the grating fits securely into the channel drain and that it is flush with the surrounding surface. Secure the grating using screws or clips, if necessary. The grating should be easily removable for cleaning and maintenance.
Maintenance and Longevity: Ensuring Continued Performance
Regular maintenance is essential to ensure the long-term performance and longevity of a patio channel drain system. Simple maintenance practices can prevent clogs, prolong the lifespan of the system, and maintain its aesthetic appeal.
Inspect the channel drain regularly for debris such as leaves, twigs, and dirt. Remove any accumulated debris to prevent clogs and maintain efficient water flow. Use a garden hose or pressure washer to flush out the channel drain if necessary. Inspect the grating for damage or wear and replace it if needed.
Periodically check the drainage outlets to ensure they are not blocked by debris or vegetation. Clear any obstructions to allow water to flow freely. Inspect the connection between the channel drain and the drainage system for leaks and repair any leaks promptly.
Consider installing a leaf filter or other debris screen at the drainage outlet to prevent larger debris from entering the drainage system. This can significantly reduce the frequency of maintenance and prevent clogs in the downstream drainage pipes.
In areas with freezing temperatures, take precautions to prevent ice from forming in the channel drain. Use de-icing agents or heat tape to keep the drain from freezing. Clear any snow or ice that accumulates around the drain to allow water to flow freely. Ice accumulation can damage the channel drain and reduce its effectiveness.
By following these guidelines, homeowners and contractors can successfully install and maintain patio channel drain systems, ensuring effective drainage and protecting outdoor spaces from water damage. A well-planned and executed channel drain installation contributes significantly to the longevity, functionality, and aesthetic appeal of patios and other landscaped areas.

Everything You Need To Know About Channel Drains

Retrofitting Plastic Patio Drains Trench Drain Com

How To Install A Channel Drain French Alternative

Channel Trench Drain Installation First Choice Drainage Solutions Repairs Cctv Surveys De Scaling And Cleaning

Drainage Channel Linear Drains Pavingexpert

How To Install Channel Drainage Easymerchant

Installing Channel Drains Correctly The New Driveway Company

How To Install A Channel Drain Chamber With Grates Buckinghamshire Landscape Gardeners

Mini Channel Drain Systems Residential Commercial Nds

Installing Channel Drains Correctly The New Driveway Company